How to Create New WordPress Admin User through phpMyAdmin
Leave a comment on How to Create New WordPress Admin User through phpMyAdmin
Creating a new WordPress admin user can be a lifesaver in various situations. Whether you’ve forgotten your login credentials or need to grant admin privileges to another user, phpMyAdmin can be a powerful tool for the job. In this guide, we will walk you through the process of creating a user in MySQL using phpMyAdmin.
Step 1: Access phpMyAdmin
First, log in to your hosting provider’s control panel and locate phpMyAdmin. In cPanel’s newest Jupiter theme, you can find it on the Tools page, in the Database section.

Step 2: Select Your WordPress Database
Once inside phpMyAdmin, you will see a list of databases on the left-hand side of the screen. These databases correspond to your website and its various components. Find your WordPress database from the list and click on it. If you’re unsure which database to select, you can find this information in your WordPress configuration file, usually named wp-config.php.
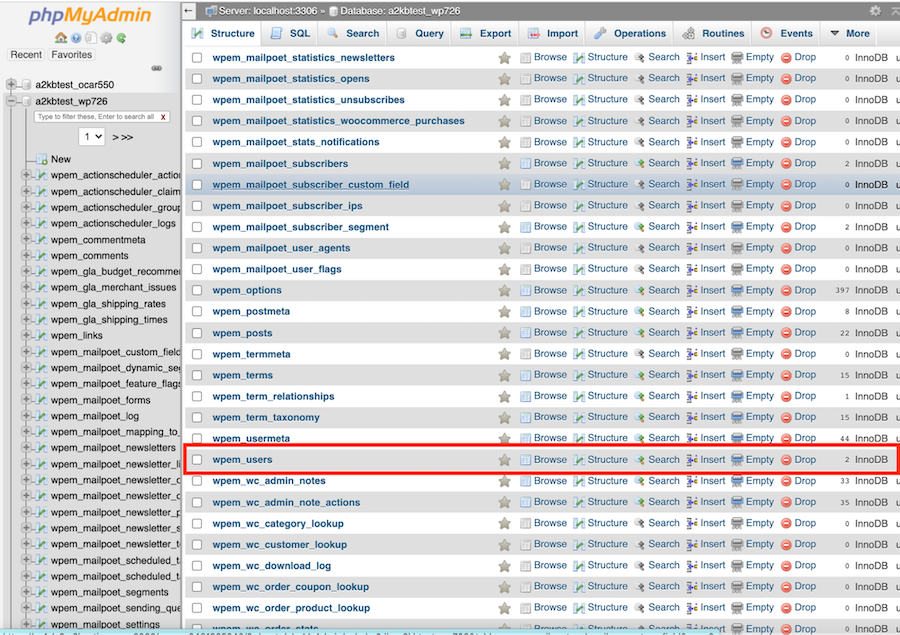
Step 3: Access the Users Table
If you’ve customized the prefix of your WordPress tables, access the corresponding users table by replacing [prefix] with your custom prefix. For example, if your prefix is “wpem“, access the wpem_users table.
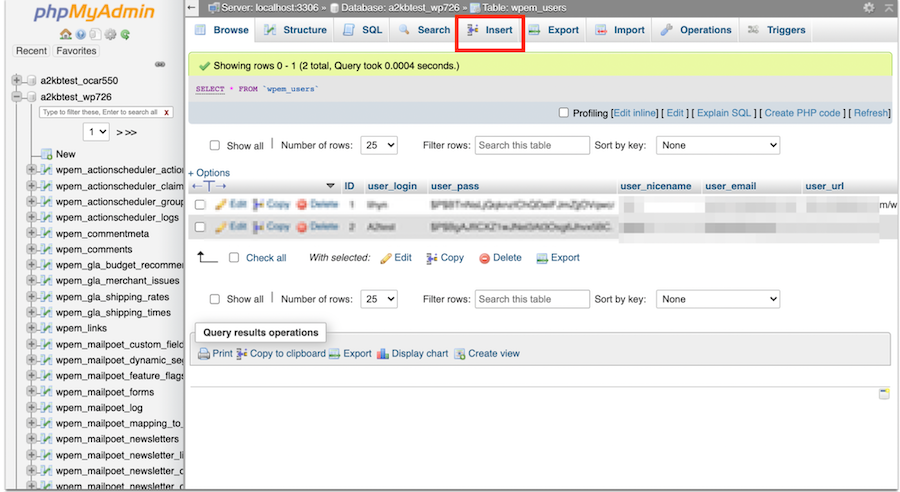
Step 4: Create a New User
Click on the “Insert” tab within the wp_users (or [prefix]_users) table to open the form for creating a new user.

In the form, enter the following user details:
user_login: Enter the desired username for the new admin user.
user_pass: Set a strong and secure password for the user. In the “Function” drop-down, select “MD5” to hash the password. You can generate an MD5 hash using online tools or scripts.
user_email: Add the email address associated with the new user.
user_registered: Select a date and time for when the user should be registered.
user_status: Set the value to “0” to make the user active.
After filling out the form, click the “Go” button to store the user information.
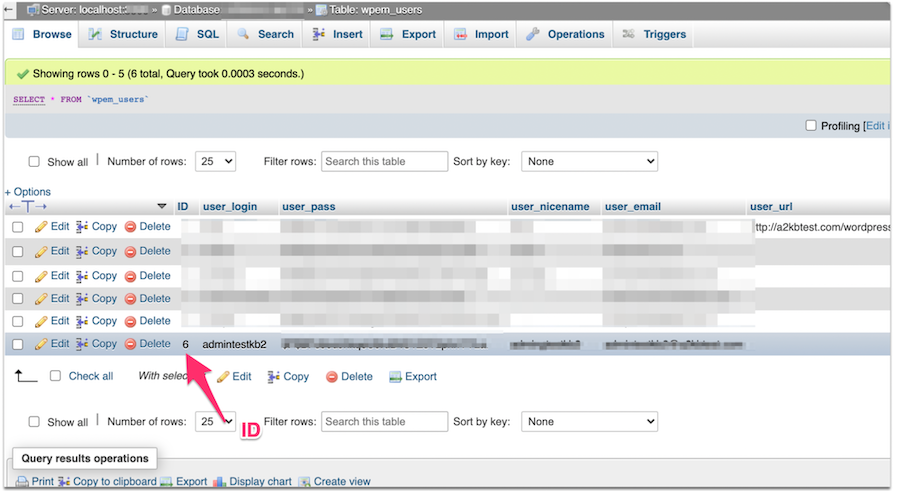
Step 6: Confirm the New User
To confirm that the new user has been created, select the “Browse” tab within the wp_users (or [prefix]_users) table.
Step 7: Assign Administrator Privileges
Click on the “Insert” tab within the wp_usermeta (or [prefix]_usermeta) table.

Fill in the following values:
user_id: Enter the ID of the user you created in the previous step (from the users table).
meta_key: Enter wp_capabilities (or [prefix]_capabilities if you have a custom prefix).
In the “meta_value” field, enter either:
a:1:{s:13:”administrator”;s:1:”1″;} if your table name doesn’t have a prefix.
a:1:{s:13:”administrator”;b:1;} if your table name has a prefix.
Click the “Go” button to save the changes.
Step 8: Login with the New User
You’ve successfully created a new WordPress admin user through phpMyAdmin. To use the new user, go to the WordPress admin login screen at https://yourdomain.com/wp-admin and enter the freshly established user credentials.
Conclusion
In conclusion, this guide has provided a clear, step-by-step process for creating a new user in MySQL using phpMyAdmin for your WordPress site. From accessing your database to filling out user details and assigning administrator privileges, you now have the knowledge to effectively manage your WordPress users. Remember to prioritize security by using strong passwords and removing unnecessary users when no longer needed. With these skills, you can confidently handle user management tasks for your website.