How to Setup Reverse Proxy to Other Applications Running on Your VPS
Leave a comment on How to Setup Reverse Proxy to Other Applications Running on Your VPS
Step 1: Launch two apps using separate ports
We have two Node.js apps operating on two distinct ports, as seen below.
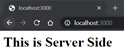
A server application using port 3000
Server app running on Port 3000
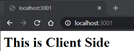
Client app running on Port 3001
We need to map it with something that is more understandable because once our apps are up and running, we don’t want customers to use them by directly inputting their PORTS.
Subdomains will be used in this example to set them apart from one another. Again, one is allowed to use any element that is appropriate for the situation.
Another illustration might be a specific route, such as domain/client and domain/server. The differentiating element can only be used if it follows a legitimate URL regular expression.
Step 2: Include DNS records
In order to add DNS records to a DNS administration dashboard, one would do so here. This step can be skipped if you are running Nginx locally.
The general DNS Configurations would be something like this:
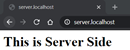
Server app is mapped to the server.domain
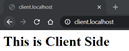
Client app is mapped to the client.domain
My Localhost Config, in this situation, would be presented as:
Server is mapped to server.localhost
Client is mapped to client.localhost
The two protocols HTTP and HTTPS are considered standards. HTTPS uses port 443, but HTTP is always on port 80. Our NGINX server has already occupied these two ports, so it’s important to avoid running another application on the same ports. All queries sent by the client are either routed to port 80 or port 443, where they are then internally routed to the appropriate application.
Step 3: Configure Nginx at 443 for HTTPS and 80 for HTTP
Since our apps are now operational and our DNS records are prepared, to make it all work, we may begin configuring our NGINX Reverse Proxy.
For Linux and Debian-based systems, the configuration file is by default called nginx.conf and stored in the directories /usr/local/nginx/conf, /etc/nginx, or /usr/local/etc/nginx.
The file is put in the nginx/conf/nginx.conf installation folder on Windows.
Include the following settings within the HTTPS block:
Setup HTTPS
server {
    listen 443 ssl http2;
    listen [::]:443 ssl http2;
    server_name server.domain;
    location / {
        proxy_pass "http://localhost:3000/";
    }
    ssl_certificate <location of SSL certificate>;
    ssl_certificate_key <location of SSL certificate Key>;
}
server {
    listen 443 ssl http2;
    listen [::]:443 ssl http2;
    server_name client.domain;
    location / {
        proxy_pass "http://localhost:3001/";
    }
    ssl_certificate <location of SSL certificate>;
    ssl_certificate_key <location of SSL certificate Key>;
}
Setup HTTP
server {
     listen       80;
     server_name  server.domain;
     location / {
          proxy_pass "http://localhost:3000" ;
     }
}
server {
     listen       80;
     server_name  client.domain;
     location / {
          proxy_pass "http://localhost:3001" ;
     }
}
Please keep in mind that the following configurations provided are the bare minimum required for NGINX reverse proxying. However, you are encouraged to explore additional configuration settings to suit your specific needs.
Make sure to replace the domain name mentioned with your actual domain. If you require SSL encryption, obtain an SSL Certificate and Key from your chosen SSL provider.
Step 4: Remember to save your changes after making edits
Before reloading NGINX, it is advisable to test your modifications using the command sudo nginx -t. This step ensures that your server won’t encounter any configuration file issues that could potentially cause a crash.
Once you receive a confirmation message indicating that the test was successful, you can proceed to restart NGINX promptly.
To restart NGINX, use the command sudo nginx -s reload.
To access your applications running on the configured URLs, open a web browser and enter the respective URLs, for example:
client.localhost
server.localhost
NGINX’s internal traffic routing enhances the security of your server. By exposing only ports 80 and 443, you can achieve the desired functionality, eliminating the need to make all ports, such as 3000 and 3001 in this case, accessible to the internet.
Using a reverse proxy like NGINX ensures that all traffic passes through the secure NGINX server, acting as a gateway, before reaching the appropriate application. This approach is preferred because it significantly reduces the risk of malicious activities by hackers who might exploit open ports. It provides an added layer of security compared to opening multiple ports for each deployed application.
Conclusion
Upon completion, the final outcome will resemble the following:
In large systems, the microservices design plays a crucial role as each application provides specific services. The capability to manage multiple apps becomes essential in such scenarios.