How to Extend an LVM Partition
Logical Volume Management (LVM) is a technique for virtualizing storage that provides system administrators with greater flexibility in managing disk storage space than conventional partitioning. With LVM, disk space management is highly adaptable, enabling administrators to dynamically adjust storage allocations to meet changing needs.
Warning: Please be sure to back up any important data before attempting to perform such a procedure. Also, this tutorial assumes your filesystem is already set up with an LVM environment. This tutorial will not work if your server is already configured on a standard partition environment without LVM in place.
Advantages of LVM
Extending or Reducing a partition is very easy if the filesystem on it supports disk extension. The file systems ext2, ext3, ext4, and XFS support resizing. Some file systems like BTRFS and ZFS do not support resizing. Normally, we need to unmount the partition for resizing it. But, some filesystems like ext3 and ext4 allow resizing while the partition is mounted or online.
In the traditional way of partitioning, if the disk space is 100% used, we had to attach new disk and move some data to the new disk. But, using LVM, we can extend a partition on one disk to the newly added disk easily.
Resizing Logical Volume
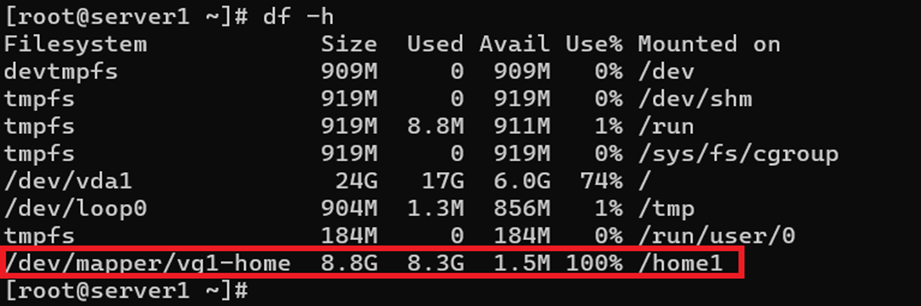
Here we are going to explain the whole process of extending an LVM partition using an example. From, the following image, you can see that the /home1 partition is 100% used. The /home1 directory is mounted to the Logical Volume /dev/mapper/vg1-home.
By running the “lvdisplay” command, you can understand the name and size of the logical volume and the volume group name on which the logical volume is created.
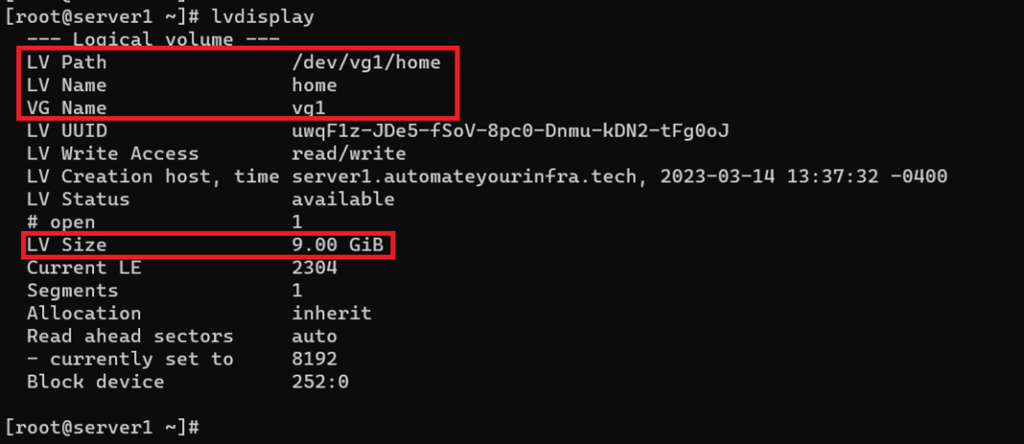
From the above image, we can see that the logical volume named “home” is created on a volume group named “vg1” and the size of the logical volume is 9 GB only. You can extend the logical volume’s size if there is free space available on the volume group.
To print the details of the volume group, we need to run the command “vgdisplay”.
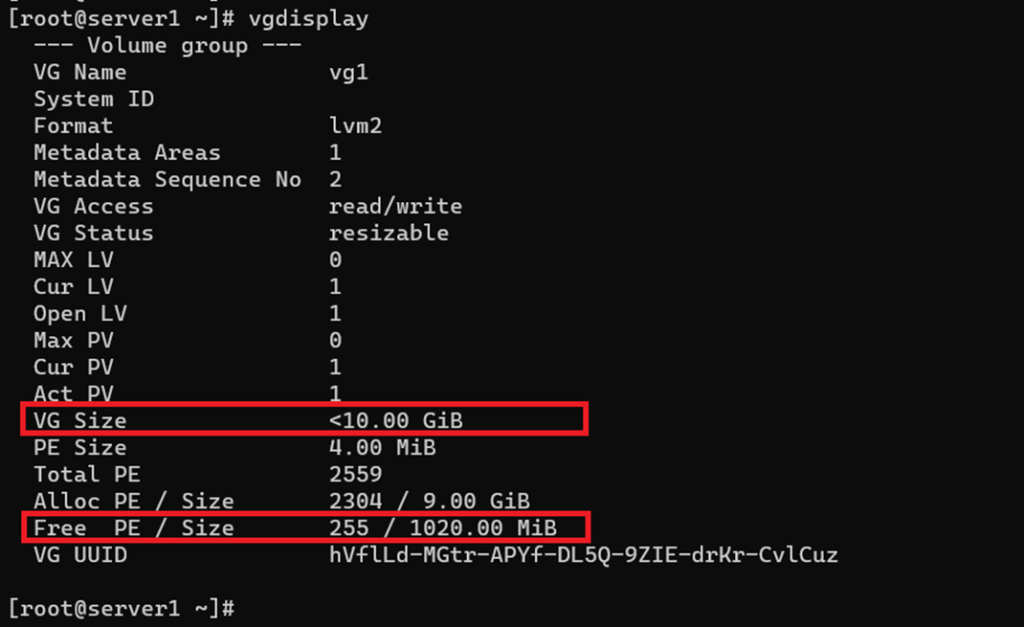
From the above image, we can see that the size of the volume group named “vg1” is approximately 10 GB and there is only 1020 MB free space left on the volume group. The free space left on the volume group is not enough to upgrade the logical volume size to 15 GB.
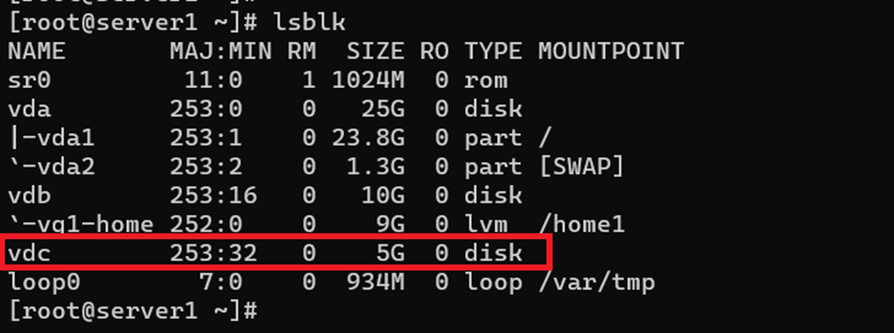
So, we need to increase the free space on the volume group for us to increase the logical volume’s size. For that, we have attached another disk (vdc) with a size of 5 GB to the server. You can run the command “lsblk” to verify this after attaching the new disk on the server.
Now, you need to create a new physical volume using the newly added disk (vdc) and add the newly created physical volume to the volume group named “vg1” to increase the free space on the volume group.
You can run the command “pvcreate /dev/vdc” to create new physical volume using the newly added disk.

Now, we can extend the volume group’s size by adding the newly created physical volume (/dev/vdc) to the volume group “vg1”. For that run the command “vgextend /dev/vg1 /dev/vdc”. After extending the volume group, run the “vgdisplay” command to verify the new size of the volume group.
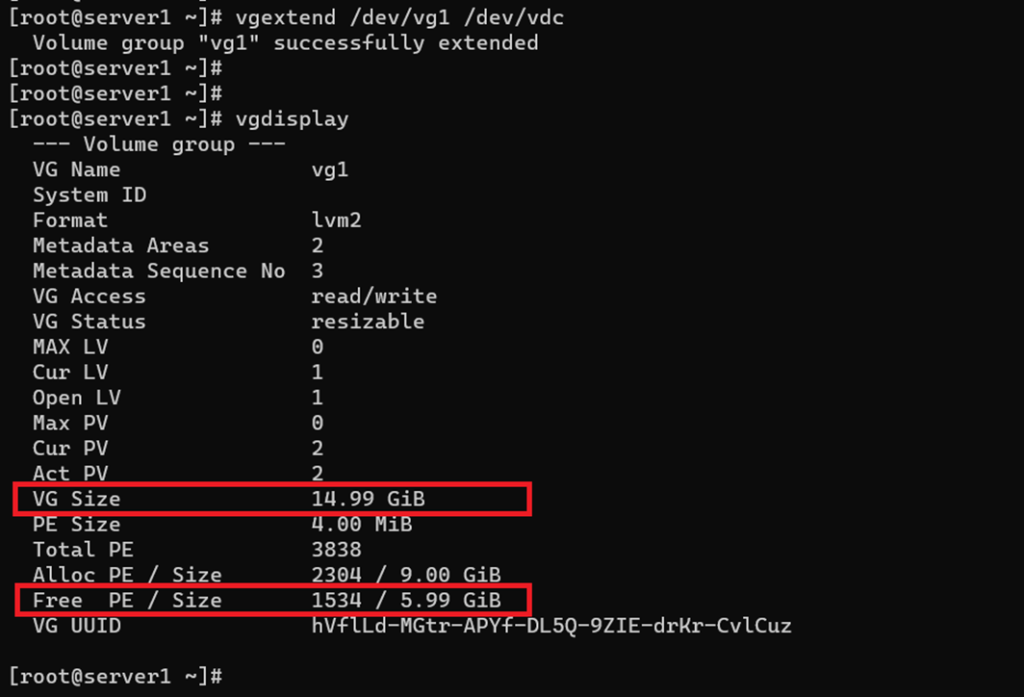
From the above image, we can verify that the volume group’s size has been increased to 14.99 GB and there is 5.99 GB free space available on the volume group now. So, there is enough free space available on the volume group now and we can increase the logical volume’s size by using the free space available on the volume group.
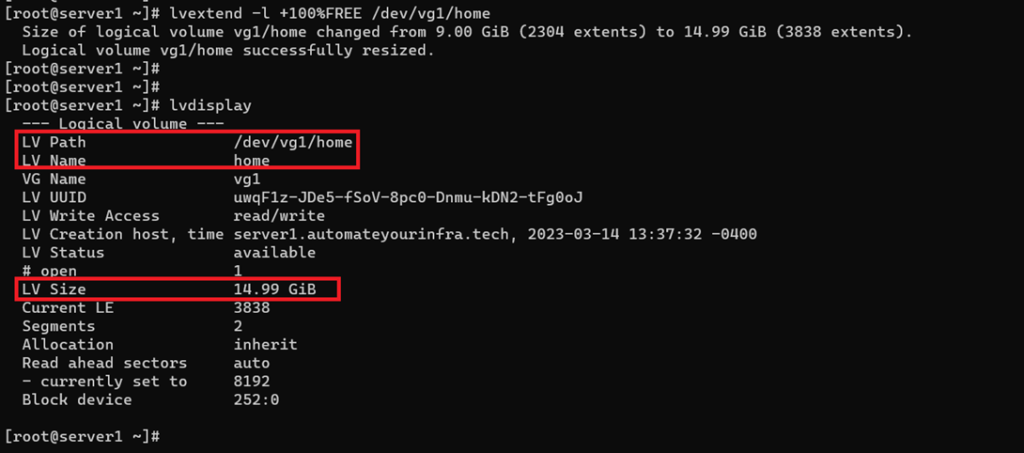
You can run the following command if you want to extend the logical volume by using all the available free space on the volume group.
lvextend -l +100% /dev/vg1/homeIf you want to add only 5 GB space to the logical volume, you can run the following command.
lvextend -L +5G /dev/vg1/homeThe above command will use 5 GB from the free space available on the volume group and add that 5 GB disk space to the logical volume.
Here, I am going to extend the logical volume named “home” using the whole free space available on the volume group. That means, here we are going to add 5.99 GB to the logical volume “home”. After extending the logical volume, you can verify the new size of the logical volume by running the command “lvdisplay”
Now, the partition has been extended to 14.99 GB. But we have not extended the filesystem on the partition yet. We need to extend the filesystem on the partition as well for us to use the extended disk space on the partition.
We should know what filesystem is used by the partition for us to extend the filesystem on the partition. You can check the /etc/fstab file to know what filesystem the partition is using. You can use the “resize2fs” command to extend the filesystem if you are using ext3 or ext4 filesystem. If you are using XFS filesystem on the partition, you can use “xfsgrow” command to extend the filesystem on the partition.
Here, I am using the resize2fs” command to extend the filesystem on the partition since the filesystem on the partition is ext4.
resize2fs /dev/vg1/homeFinally, run the command “df -h” to verify the filesystem is extended successfully.
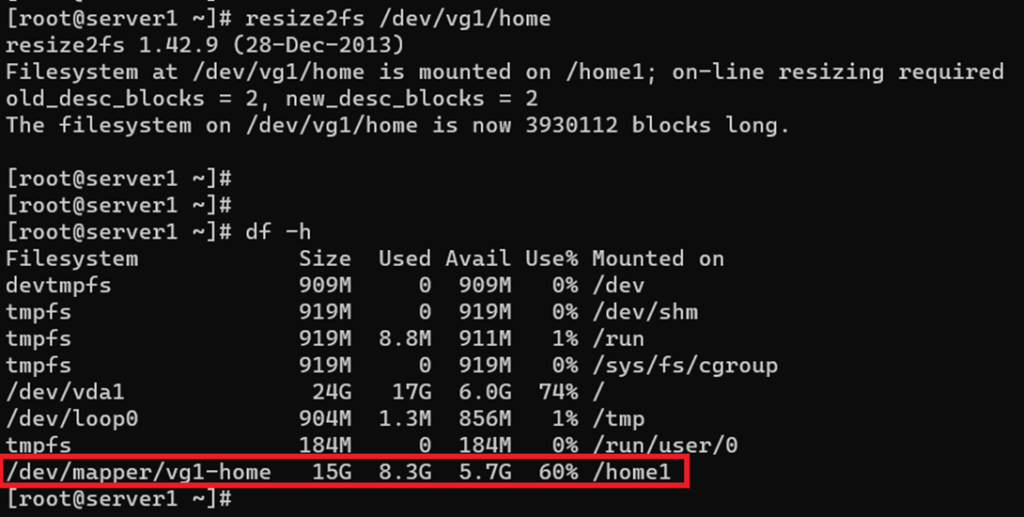
From the df -h command output, we can confirm that /home1 partition has been extended successfully and the usage of the partition has been decreased to 60% from 100%.