How to Setup Cron Jobs in cPanel
Cron jobs are an essential tool for automating routine tasks on your web hosting server. Whether you need to run a script, command, or program at specific intervals, cron jobs are your go-to solution. In this guide, we will walk you through the process of setting up cron jobs in cPanel, a popular web hosting control panel.
Accessing Cron Jobs in cPanel
Setting up cron jobs in cPanel is straightforward and user-friendly. Follow these steps to get started:
- Log into cPanel: Begin by logging into your cPanel account. If you are unsure how to do this, contact your hosting provider for assistance.
- Navigate to the Cron Jobs Section: Once you are logged in, locate the “Cron Jobs” option. You can typically find it in the “Advanced” section of your cPanel dashboard.
- Add a New Cron Job: In the Cron Jobs interface, scroll down to the “Add New Cron Job” section. Here, you’ll specify the timing and command for your cron job.
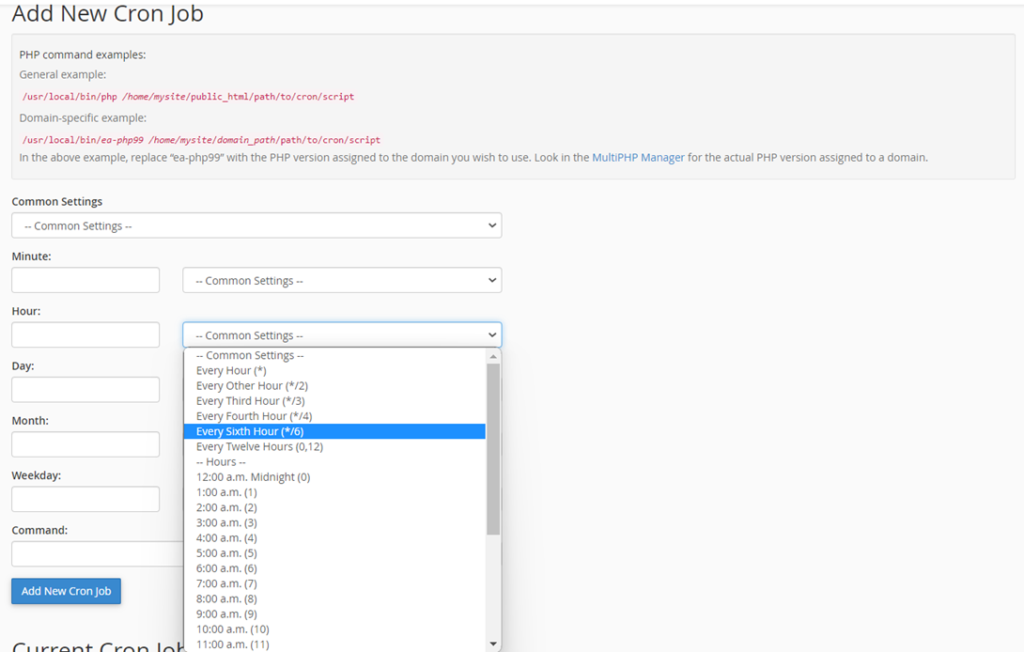
Setting the Timing for Your Cron Job
To schedule your cron job, you’ll need to specify the timing details using the following fields:
- Minute: The minute of the hour when you want the cron job to run (e.g., 0-59).
- Hour: The hour of the day when you want the cron job to run (e.g., 0-23).
- Day: The day of the month when you want the cron job to run (e.g., 1-31).
- Month: The month of the year when you want the cron job to run (e.g., 1-12).
- Weekday: The day of the week when you want the cron job to run (e.g., 0-6, where 0 represents Sunday).
Using Common Settings
cPanel offers common settings to simplify scheduling. By selecting a common setting, the corresponding timing fields will be automatically filled in. This feature is particularly handy when you have typical intervals like every hour or every day.
Defining the Command
The “Command” field is where you specify the task or script you want to run. Here are some examples of how to define tasks in the command section:
- Running a PHP script using the system PHP version:
/usr/local/bin/php /home/mysite/public_html/cron.php- Running a PHP script using the domain’s PHP version (replace ea-php80 accordingly):
/usr/local/bin/ea-php80 /home/mysite/public_html/cron.php- Running a shell (Bash) script:
/bin/bash /home/mysite/public_html/script.sh- Running a Linux command (e.g., deleting temporary files):
rm -f /home/mysite/public_html/tempfile*Managing Cron Jobs
After adding a cron job, it will appear under the “Current Cron Jobs” section in the Cron Jobs interface. You’ll notice “Edit” and “Delete” buttons next to each cron job, allowing you to make changes or remove them as needed.

Receiving Cron Job Output
When a cron job runs, the output is sent to your contact email address associated with your cPanel account by default. If you prefer to receive the output at a different email address, you can specify it in the “Cron Email” section on the Cron Jobs interface.
Note: If you don’t want to receive cron job emails, you can redirect the command output to /dev/null by adding “> /dev/null 2>&1” at the end of your command. Here’s an example:
/usr/local/bin/ea-php80 /home/mysite/public_html/cron.php > /dev/null 2>&1Conclusion
In conclusion, setting up cron jobs in cPanel is a powerful way to automate tasks on your web hosting server. With the ability to schedule tasks at precise intervals, you can streamline various aspects of your website or server maintenance. Take advantage of this feature to save time and ensure your online operations run smoothly.
How to Setup Cron Jobs in cPanel Video Tutorial
Related Video:
In this video, we will walk you through how to setup a cron job with a demo WordPress website, step-by-step.
If you’re unfamiliar with WP Automatic plugin, it’s a powerful WordPress plugin that automatically adds content to any WordPress site. We will share with you on how to setup a cron job with WP Automatic plugin that requires a cron job, and will set it up within your cPanel account.
So, by the end of this video, you should already know How to Add a Cron Job In cPanel.