How to Install Minecraft on a VPS
In this tutorial, we will walk you through how you can set up a Minecraft Server on a VPS or Dedicated Server.
Prerequisites:
- VPS or Dedicated Server with either Ubuntu or Debian
- Root access to the server
- SSH Client (see this video tutorial on how to SSH into your server)
- It is recommended that you have a server with at least 1 GB RAM and 2 CPU Cores for Minecraft server for approximately 4 players. If you need to support more players simultaneously, you will need to obtain a server with more RAM, and potentially more CPU cores.
Once you meet the above prerequisites, you can start proceeding to further steps on setting up Minecraft Server in few simple steps
STEP #1: Install JAVA runtime
We will be installing headless Java OpenJDK since there is no need for GUI desktop components. We will also be installing curl which will be required in step #3 below. Let’s do so by running the below commands.
sudo apt update
sudo apt upgrade
sudo apt install openjdk-14-jdk-headless
sudo apt-get install curl
Verify your java installation with command:
java –version

STEP #2: Create a folder to install Minecraft and change to the newly created Minecraft directory with below commands
mkdir minecraft
cd minecraft
STEP #3: Download the Minecraft jar file
curl -O https://s3.amazonaws.com/MinecraftDownload/launcher/minecraft_server.jar
STEP #4: Install screen to run Minecraft server in background
Screen is a tool that will allow you to keep your Minecraft server process running even when you are no longer actively SSH’d into the VPS.
sudo apt-get install screen
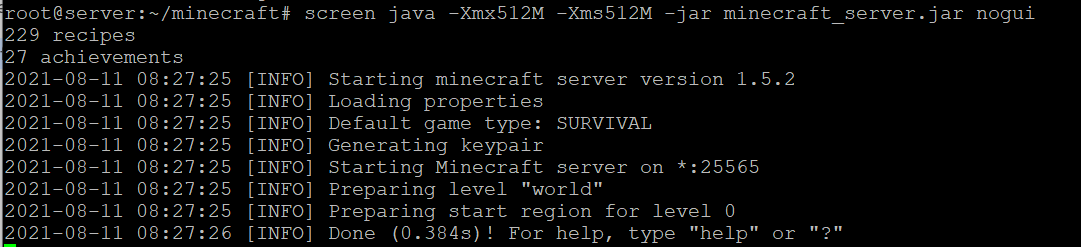
STEP #5: Start Minecraft server
screen java -Xmx512M -Xms512M -jar minecraft_server.jar nogui
Change “512M” to the amount of RAM you wish to allocate for this Minecraft server process – for 1 GB, change it to 1024M. Please be sure to not allocate more RAM than is allocated to your VPS or dedicated server.
You can now safely detach screen or close out the SSH session and the process will keep running in the background. When you SSH into your server again you can resume your screen session by running the below command:
screen -r
STEP #6: Play on your new Minecraft Server
Now that Minecraft Server is running on your server, you can access it using the port given above. In this example, you can see the Minecraft server is running on port 25565. In this case, we can connect to the Minecraft server using IP:25565 — replacing IP with the VPS or dedicated server IP address accordingly.
We hope that you enjoyed today’s tutorial which covered how to run/install a Minecraft Server on a VPS. Looking for a cheap Minecraft VPS, which is still reliable yet doesn’t break the bank? If you are looking to deploy a VPS to run Minecraft on, take a look at our powerful VPS specials by clicking here.