How to Configure Static IP Address on Ubuntu 17.10 and Higher Versions
Leave a comment on How to Configure Static IP Address on Ubuntu 17.10 and Higher Versions
In our previous tutorial, we went over how to configure a static IP address on Ubuntu 16.04. In this tutorial, we will go over how to do so on Ubuntu 17.10 and higher, because starting from Ubuntu 17.10 and up, Ubuntu introduced a new network configuration tool called NetPlan to manage network settings. This new command-line tool replaced the old interfaces file (/etc/network/interfaces) which is used to manage network interfaces on older versions of Ubuntu and to manage IP addresses bound to these interfaces. By default, NetPlan is active on all the latest versions of Ubuntu including Ubuntu 22.04. We need to edit the YAML script, that we can found in the location /etc/netplan directory, to configure Ubuntu interfaces.
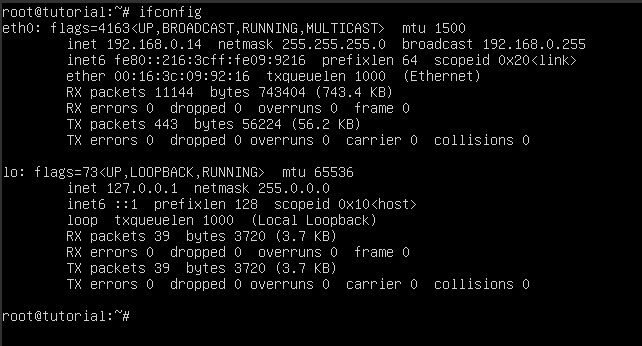
Before starting changing the network configuration (/etc/network/interfaces/*.yaml), we need to find the interface name on the server. For that we can use any of the following commands.
# ifconfig -s

# ip link

# netstat -i

From the above results, we can see that the active network interface name is eth0.
Next, we are going to configure a static IP address on the eth0 interface. For that, we need to edit the YAML script located in the directory /etc/netplan. You can edit the network configuration file (/etc/network/interfaces/*.yaml) by using your favourite editing tool like nano, vim,..etc. If the YAML network configuration file does not exists, you can generate the configuration file using the command “sudo netplan generate” .
You should know the IP address, Gateway address, IP subnet, and the active interface name before editing the network configuration file. On the network configuration file, we can define networkd or NetworkManager service as the renderer and the netplan will use the defined renderer to manage the network. In our case, we are using the networkd as the renderer. The nameserver IP addresses given in the network configuration file will be used as the resolver IP addresses and it will replcae the nameservers defined on the /etc/resolv.conf file.
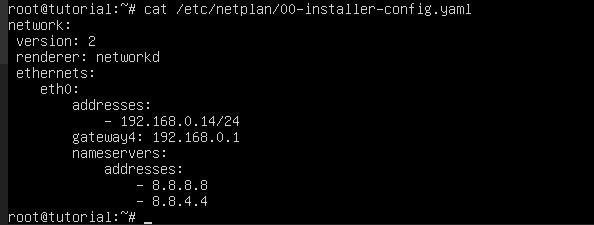
Please see the below example to configure the static IP address 192.168.0.14 on the eth0 interface.
root@tutorial:~# vi /etc/netplan/00-installer-config.yaml
++++++++++++++++++++++++++++++++++++
network:
version: 2
renderer: networkd
ethernets:
eth0:
addresses:
– 192.168.0.14/24
gateway4: 192.168.0.1
nameservers:
addresses:
– 8.8.8.8
– 8.8.4.4
++++++++++++++++++++++++++++++++++++
Now, you need to run the following command to apply the changes.
# sudo netplan apply
Verify that the new IP address has been added successfully by running the “ifconfig” command.