Portainer – An Easy Docker Management Utility
Leave a comment on Portainer – An Easy Docker Management Utility
In modern software development, many use microservices architecture, and Dockerization is crucial. When handling Docker containers, images, volumes, etc., on a host, developers or IT team members often find Portainer helpful.
What is a Portainer?
Portainer is a web-based GUI tool that simplifies the administration of the Docker environment. It supports both standalone docker environments and docker swarm.
How to Install Portainer?
The installation process is simple. Begin by installing Docker on your host machine. After that, create a Docker Compose file and execute it. Let’s explore the steps in more detail below:
Step 1: Install Docker
Create a bash script named docker.sh using the command vi docker.sh.
Add Docker’s official GPG key:
sudo apt-get update
sudo apt-get install ca-certificates curl sudo install -m 0755 -d /etc/apt/keyrings
sudo curl -fsSL https://download.docker.com/linux/ubuntu/gpg -o
/etc/apt/keyrings/docker.asc
sudo chmod a+r /etc/apt/keyrings/docker.asc
Add the Docker repository to Apt sources:
echo "deb [arch=$(dpkg --print-architecture) signed-by=/etc/apt/keyrings/docker.asc] https://download.docker.com/linux/ubuntu $(. /etc/os-release && echo "$VERSION_CODENAME") stable" | sudo tee /etc/apt/sources.list.d/docker.list > /dev/nullUpdate your system:
apt-get updateInstall Docker and related components using the script. This includes Docker Engine, Docker CLI, Containerd, and the Docker Buildx plugin:
apt-get install docker-ce docker-ce-cli containerd.io docker-buildx-plugin
Confirm that Docker is installed correctly by running:
docker -v
For more detailed instructions, refer to the official documentation: Docker Installation Guide for Ubuntu.
Step 2: Install Docker Compose
To install the Docker Compose utility, use the following command:
apt-get install docker-composeStep 3: Install Portainer using Docker Compose
Create a directory for Portainer:
mkdir /opt/portainerNavigate to the Portainer directory:
cd /opt/portainerCreate and edit the docker-compose.yml file:
vi docker-compose.ymlAdd the following content to docker-compose.yml:
version: '3'

services:
  portainer:
    image: portainer/portainer-ce:latest
    container_name: portainer
    restart: unless-stopped
    security_opt:
      - no-new-privileges:true
    volumes:
      - /etc/localtime:/etc/localtime:ro
      - /var/run/docker.sock:/var/run/docker.sock:ro
      - ./portainer-data:/data
    ports:
      - 8001:8001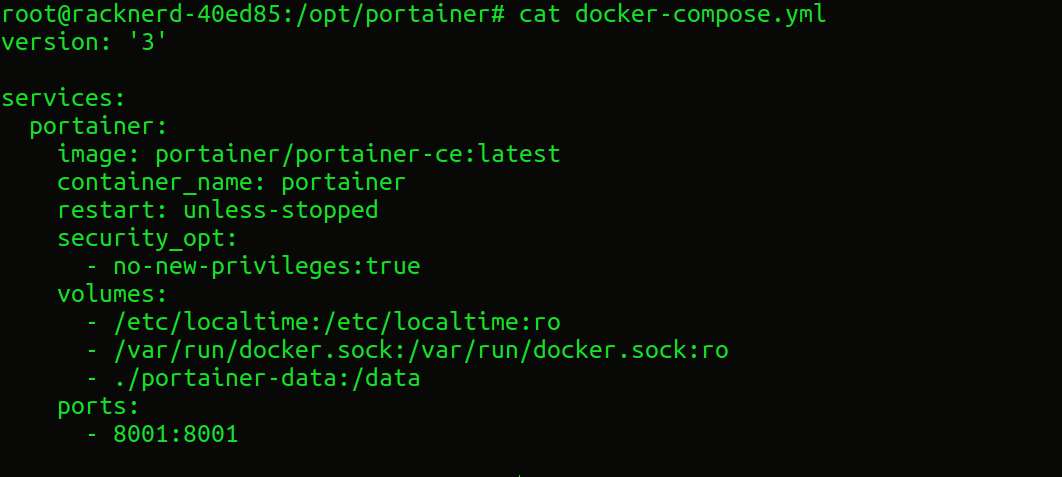
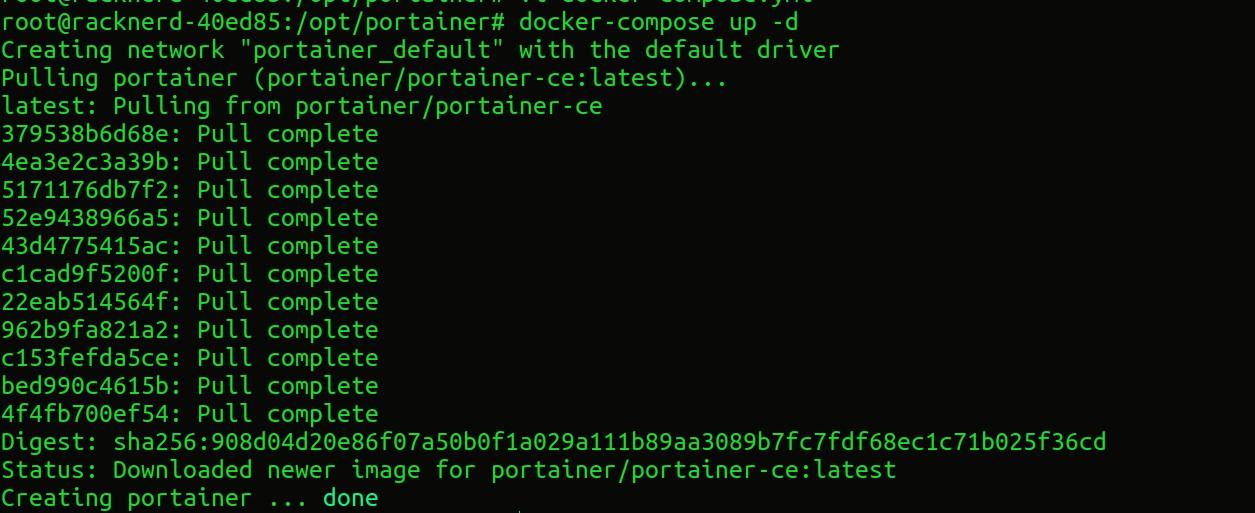
Save the file, and then execute the following command to start Portainer:
docker-compose up -dNow, Portainer should be running, and you can access it through your browser at http://localhost:8001.
Congratulations! You have successfully installed Portainer. To verify, execute the following command:
docker ps
Step 4 – Verify and Login into Portainer
You can now log in to your Portainer account by visiting http://localhost:8001 and set up your password initially.

The Portainer dashboard makes it easy to manage running containers, images, volumes, and install new stacks effortlessly. So, that’s it!
Conclusion
The Portainer utility is straightforward to install and proves highly useful in managing Dockerized environments. By following this guide, your Portainer utility should now been installed successfully. To learn more, make sure to stay tuned for our next content on our blog and we highly recommend you to check out our YouTube channel for video tutorials that you may find helpful. Until next time, take care!