How to Run WordPress on a Docker Container
Leave a comment on How to Run WordPress on a Docker Container
Ever wonder how to exactly run WordPress within a Docker container? In this tutorial, brought to you by the server experts at RackNerd, we will cover a detailed and simple way to run WordPress on Docker Container in your CentOS VPS. If you don’t already have a VPS, you can deploy one by clicking here.
Why Use Docker?
Docker helps run your service in an isolated environment. Each container doesn’t require to have its own operating system and shares the kernel on host. Thus, the machine workload will be light weight and a single container can run multiple containers in same time. In addition, all, you will be saving memory and space on your VPS server.
So, let’s move on to our step by step guide on how run WordPress on Docker Container in your VPS.
STEP #1: Login to your VPS node
Here, we will be using a CentOS VPS to run WordPress on Docker
Run the below commands to Install docker on your CentOS VPS:
yum update
Next, install docker dependencies on your system:
yum install yum-utils device-mapper-persistent-data lvm2


At this point, Docker dependencies have been successfully installed on our VPS server.
STEP #2: Add Centos docker stable repo to your VPS server with below command
yum-config-manager –add-repo https://download.docker.com/linux/centos/docker-ce.repo

STEP #3: Once docker stable repo has been added, lets start installing docker running below command:
yum install -y docker-ce
By now, Docker has been successfully installed

STEP #4: Docker has been installed, now start docker and enable to automatically to start every time the server is booted.
systemctl start docker
systemctl enable docker

Now check status of docker service with command
systemctl status docker

At this time Docker has been setup, now we can move on to the next part of this tutorial, which is how to install WordPress on Docker.
Since we will be using a simple and automatic way to run WordPress, we would need “Docker Compose” Service to be installed on your VPS server
STEP #5: Run below commands to setup Docker Compose Service
curl -L “https://github.com/docker/compose/releases/download/1.23.1/docker-compose-$(uname -s)-$(uname -m)” -o /usr/local/bin/docker-compose

Once compose has been downloaded make it executable with below command
chmod +x /usr/local/bin/docker-compose
Now check docker compose version using below command,
docker-compose –version

STEP #6: Setting up WordPress on Docker
Create a new directory for WordPress by running below commands:
mkdir ~/wordpress/
cd ~/wordpress/
Create docker-compose.yml in the new directory wordpress.
In this tutorial we will be using the vi editor to create docker-compose.yml file run below command to enter editor and and paste the content below. Don’t forget to change the credentials.
vi docker-compose.yml
version: ‘3.3’
services:
db:
image: mysql:5.7
volumes:
– db_data:/var/lib/mysql
restart: always
environment:
MYSQL_ROOT_PASSWORD: racknerdtest
MYSQL_DATABASE: racknerdwordpress
MYSQL_USER: wordpress-rd
MYSQL_PASSWORD: wordpress-rd
wordpress:
depends_on:
– db
image: wordpress:latest
ports:
– “8000:80”
restart: always
environment:
WORDPRESS_DB_HOST: db:3306
WORDPRESS_DB_USER: wordpressrd
WORDPRESS_DB_PASSWORD: wordpressrd
WORDPRESS_DB_NAME: wordpressrd
volumes:
db_data: {}
Save and exit editor using wq!
STEP #7: Run this below command to create wordPress running on docker container
docker-compose up -d
You will now see an output like this:

STEP #9: Run below command to check WordPress running on your VPS
docker ps

You will notice two containers running, one is a WordPress container and another is MySQL database container.
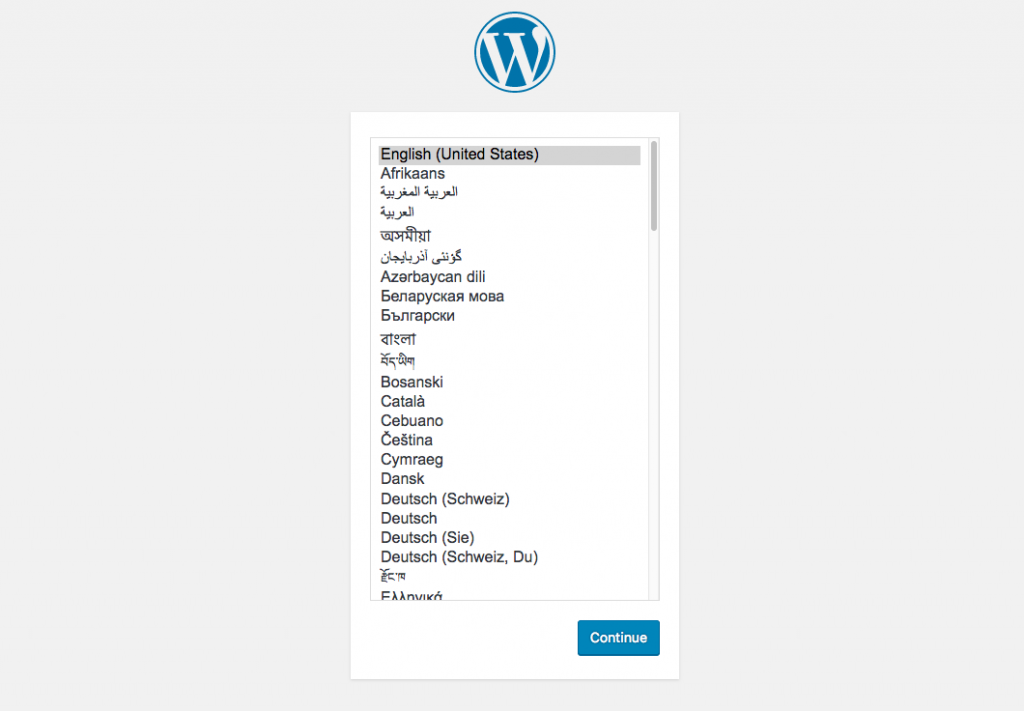
STEP #10: Open a web browser on your computer and in the address bar, enter VPS _server_IP:8000 and the WordPress setup screen will be displayed as below:

In this tutorial, you have learned set up WordPress on Docker using the Docker Compose utility. We hope you found this tutorial to be helpful!
If you are looking for a KVM VPS with full root access to deploy Docker containers on, take a look at our Linux VPS offerings here: https://www.racknerd.com/kvm-vps
