How to Install WordPress on a VPS (via command line)
4 Comments on How to Install WordPress on a VPS (via command line)
How to Install WordPress on a VPS manually via command line (installing WordPress via SSH)
If you don’t want to install a control panel (such as CyberPanel, cPanel, Plesk, DirectAdmin, etc) on your server, but are looking for a way to run WordPress without a control panel, you’ve come to the right tutorial. In this tutorial we are going to show you how to install WordPress manually via command line, without the need of a control panel!
Step 1: Connect to VPS via SSH client
Connect to your server via SSH using the root account. Here’s a video tutorial on how to connect to your VPS via SSH.
Step 2: Install software packages that required to run a WordPress and configure VPS to allow HTTP and HTTPS connection.
To run a WordPress site, you need a web server, database and PHP. These factors are typically handled by a control panel (i.e. cPanel/DirectAdmin/Plesk/CyberPanel/etc), however, in this tutorial we will be doing it all manually via the command line without relying on a control panel to install/configure these software stacks for us.
In this tutorial, we will installing Apache as the webserver, MariaDB as database server and we will be utilizing the latest available PHP version.
Before running into installing software package, first let us step firewall to allow http and https connection to our VPS server by executing the below commands within SSH:
sudo firewall-cmd –permanent –zone=public –add-service=http
sudo firewall-cmd –permanent –zone=public –add-service=https
sudo firewall-cmd –reload
To install all these packages, use the below single command,
yum install httpd mariadb mariadb-server php php-common php-mysql php-gd php-xml php-mbstring php-mcrypt php-xmlrpc unzip wget -y
Once the above packages have been installed successfully, run the below commands to make sure the services start up automatically whenever the system is booted.
systemctl start httpd
systemctl status httpd
systemctl start mariadb
systemctl status mariadb
systemctl enable httpd
systemctl enable mariadb
Step 3: Configure the MariaDB Database and create a WordPress database.
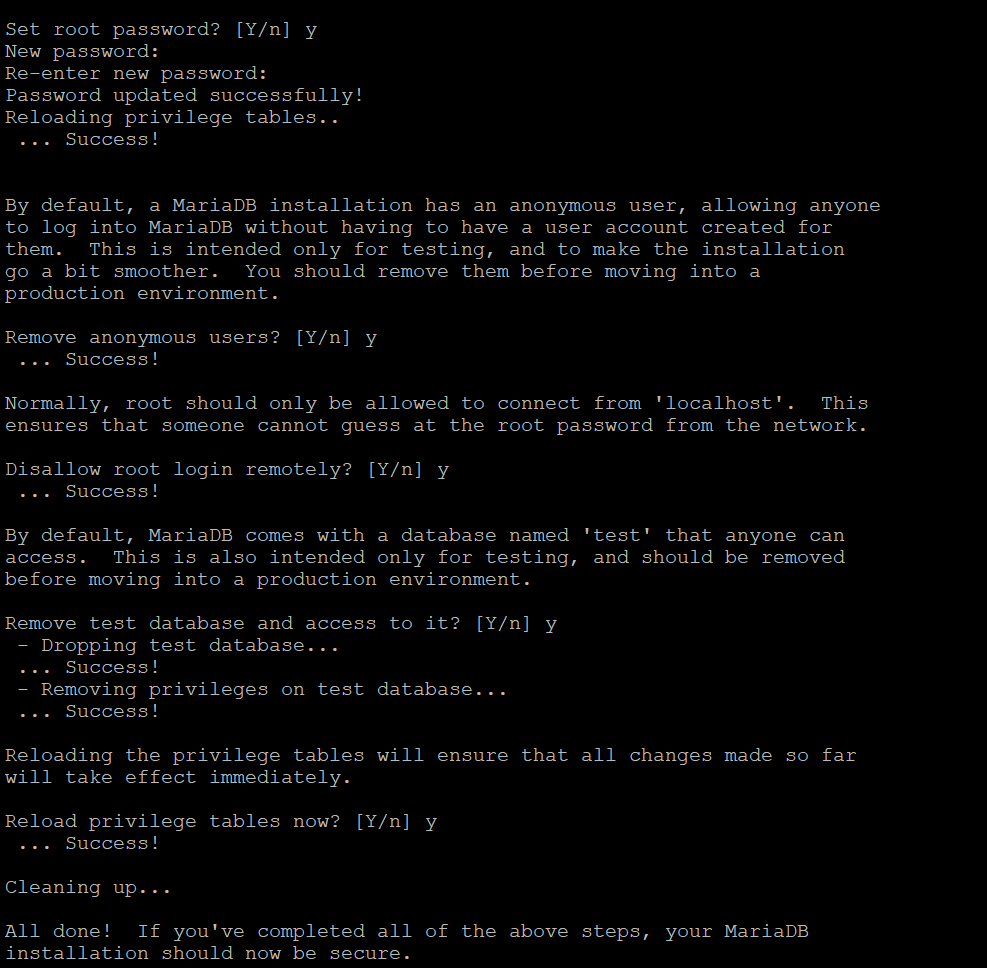
Before creating the database for your website, it’s important to secure installation of MariaDB. To do that, run the below command in SSH:
mysql_secure_installation
Once you enter above command, MariaDB database will ask you for its root user password, which should be blank, so just hit the enter key and then select Y.
Then, you’ll be able to set a new root password, once new password is set enter Y for all the remaining options, particularly number 3, which disallows remote logins for the database.
Next step is to login to database, to login to database use the below command
mysql – u root -p
Enter the password you created while securing database installation and login to database,
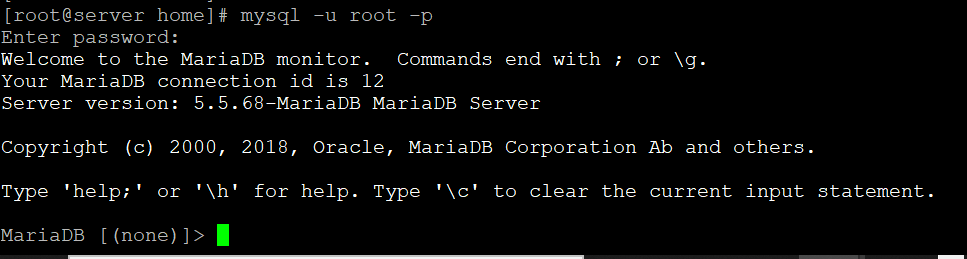
Once you enter database, run the below commands one by one
CREATE DATABASE wordpress;
GRANT ALL PRIVILEGES on wordpress.* to ‘user’@’localhost’ identified by ‘password’;
FLUSH PRIVILEGES;
exit
In the above 2nd command, do not forget replacing the user and password place holders with user and password of your choice.
At this point, your database is now ready for use.
Step 4: Install the WordPress Software
Now that our infrastructure and service required for running database is ready, now let’s move on to installing the WordPress Software Package.
Now, run the below commands, one bye one. Kindly note each command is unique command, run separately one by one
wget http://wordpress.org/latest.tar.gz
tar -xzvf latest.tar.gz
sudo cp -avr wordpress/* /var/www/html/
All the we have to do now, is create an folder for uploads and assign needed permissions by running below commands.
sudo mkdir /var/www/html/wp-content/uploads
sudo chown -R apache:apache /var/www/html/
sudo chmod -R 755 /var/www/html/
Now we should edit the wp-config file and make some changes running the below commands
cd /var/www/html/
sudo mv wp-config-sample.php wp-config.php
sudo vi wp-config.php (you can also use any text editor of your choice, such as nano if preferred)
Once the wp-config.php file is opened in vi editor, find the below fields and replace them with values you entered in step 3.
define(‘DB_NAME’, ‘wordpress’);
define(‘DB_USER’, ‘user’);
define(‘DB_PASSWORD’, ‘password );
Save the file by entering wq! In the event you are using the vi editor.
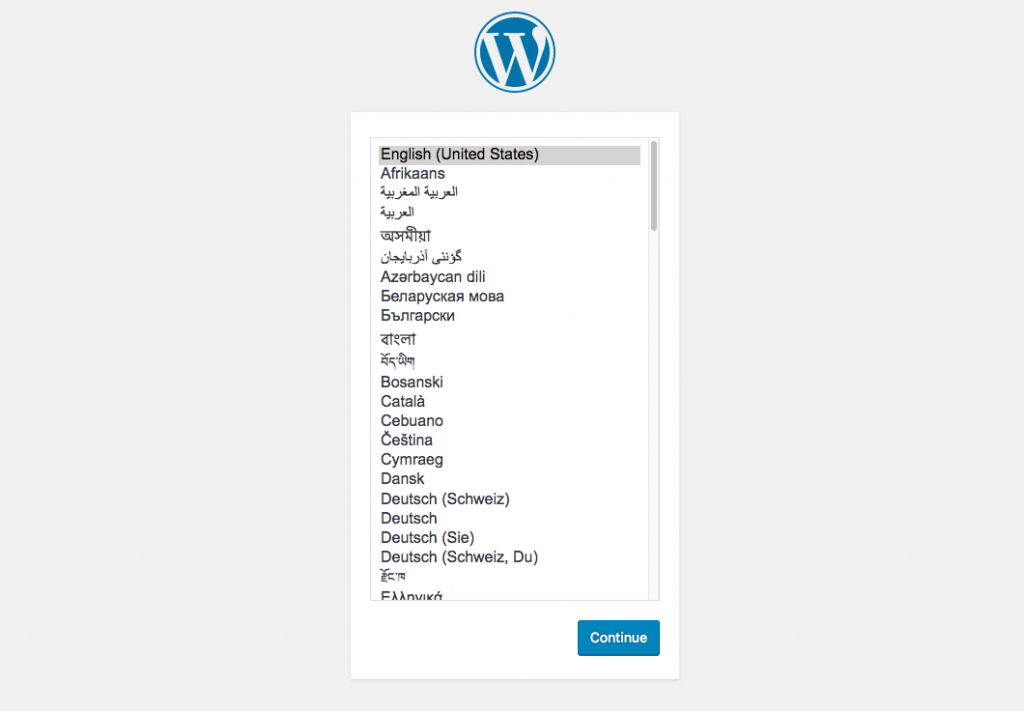
Open the web browser on your computer, and enter url http://yourvpsip and then the WordPress setup screen will be displayed as below:
In this tutorial we have successfully set up WordPress without a control panel. If you have any questions, please don’t hesitate to let us know.
NOTE: If you are looking for a VPS with full root access, take a look at RackNerd’s KVM VPS offerings here: https://www.racknerd.com/kvm-vps for instant set up VPS.
I got the following error:
sudo: firewall-cmd: command not found
Hi Alma! What operating system are you running on your server?
Almalinux
Thank you for the reply! This particular tutorial was based on Ubuntu — please reinstall your server to Ubuntu and re-attempt this tutorial.