How to Configure SpamAssassin on cPanel
SpamAssassin looks for patterns that are common in unwanted email and, if a message matches lots of patterns, it trigger the filter rule and the email is subjected to more than 600 individual tests.
It identifies junk mail with great accuracy using the methods such as Phrase test, Language test, Checks via online database and if the email IP/domain is in any of the DNS blocklists.
SpanAssassin is integrated with cPanel and you can configure the right filtering settings for your email accounts.
To configure it, follow the steps mentioned below:
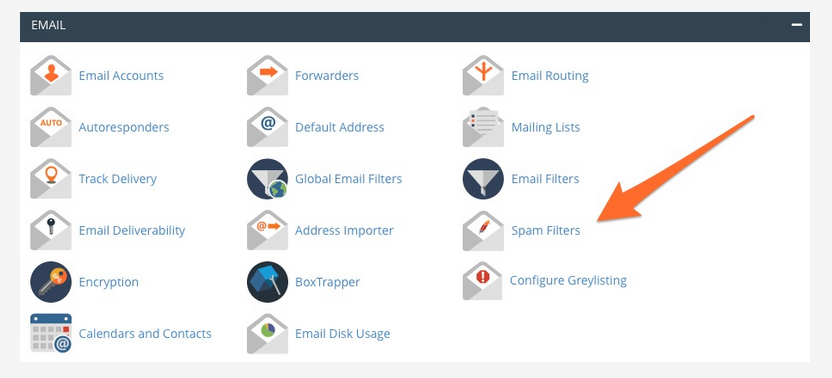
Click “Spam Filters” as shown above, and now you will need to enable “Process new emails and Mark them as Spam” as shown below:

When that switch is turned enabled, SpamAssassin marks high-scoring emails by inserting ***SPAM*** into the message’s header.
The default spam threshold value is 5. You can adjust it according to your preference. Setting the threshold score too low may flag genuine emails as spam as the emails as filtered through sensitive filters.
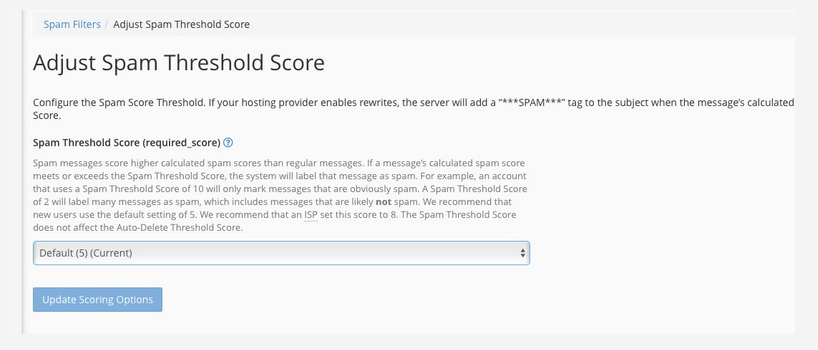
It is always a good idea to set the score to default value 5 and tweak it down the road if needed, that way there will not be too many false positives.
If you want the spam messages to be moved to SPAM box, the enabled the setting “Move New Spam to a Seperate Folder” as shown below, otherwise, it will simply be prefixed with SPAM in the subject line:

When the Spam Box is activated, flagged messages are moved to a separate folder, which you can create inside email account. Normally the folder is named as “SPAM”, so that spam tagged emails are moved to “SPAM” box automatically.
The other methods which can be used for filtering is via “Whitelist & Blacklist” option under “Show Additional Configurations”.
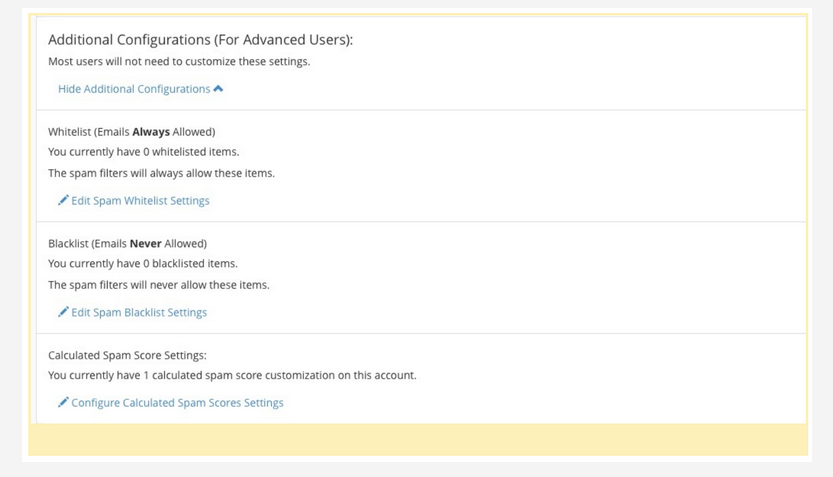
If we want to allow email senders always, whitelist them using “whitelist filter”, so that they are allowed through even if their messages are flagged. If the sender is blacklisted, messages from senders on the blacklist are prevented from entering inboxes.
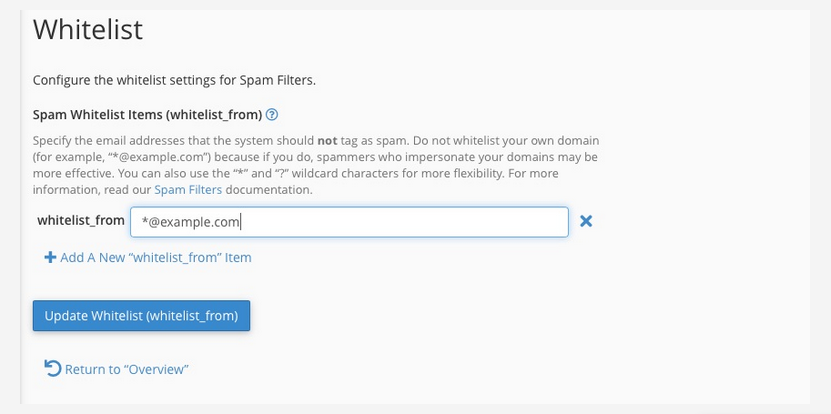
If you want to add a sender to Whitelist, click “Add A New “Whitelist_from” item” and click “Update Whitelist (Whitelist_from)”.
This is the same procedure for blacklisting too. We hope that you found this tutorial helpful.