How to Set Up MongoDB in an Atlas Account
Leave a comment on How to Set Up MongoDB in an Atlas Account
Introduction
MongoDB Atlas is a fully managed cloud database service provided by MongoDB. It simplifies database deployment, management, and scaling, allowing you to focus on your application rather than managing infrastructure. Whether you’re setting up MongoDB for the first time or moving your data to the cloud, this tutorial will walk you through creating a MongoDB Atlas account, deploying your first cluster, and connecting to your database.
Why Use MongoDB Atlas?
- Fully Managed: MongoDB Atlas handles server maintenance, backups, scaling, and updates automatically.
- Scalability: Easily scale your database as your application grows, with options for horizontal scaling, backup, and recovery.
- Security: MongoDB Atlas offers automated backups, encryption (both in transit and at rest), and advanced security features like IP whitelisting and multi-factor authentication (MFA).
- Cloud Support: You can deploy your cluster on major cloud providers such as AWS, Google Cloud Platform (GCP), and Microsoft Azure.
Now, let’s walk through the steps to set up MongoDB in your Atlas account.
Step 1: Create a MongoDB Atlas Account
To get started with MongoDB Atlas, you’ll need to sign up for an account:
- Visit MongoDB Atlas and click on Try Free.

- Sign up using your Google or GitHub account, or create an account using your email and a password.
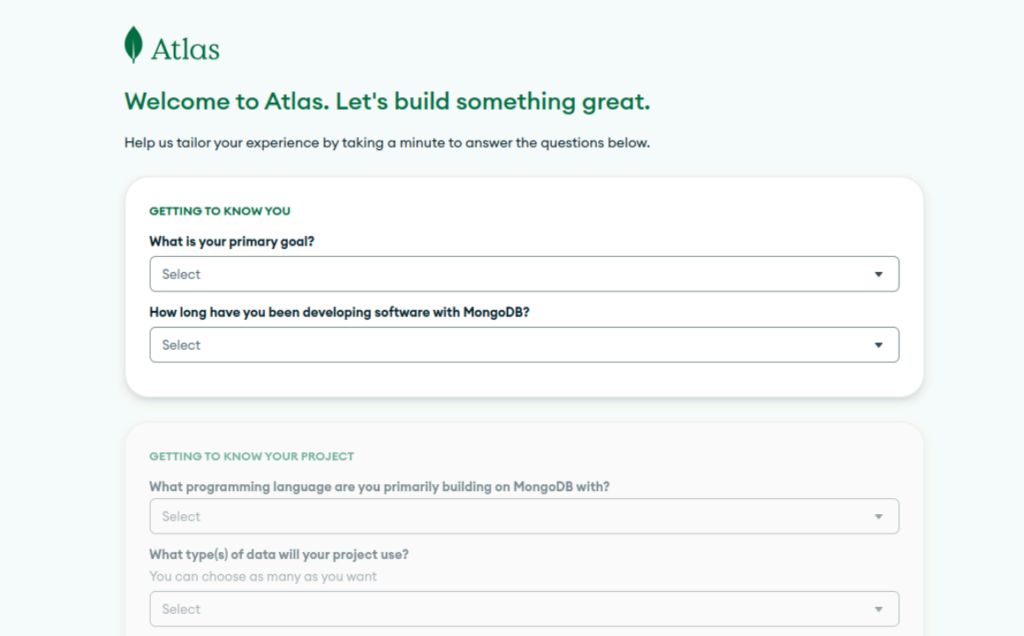
Once you’ve completed the signup, you’ll be redirected to the Atlas Personalization page, where you’ll be asked to choose the appropriate settings for your account. Once you’re done, click Finish.
Step 2: Complete Your Account Setup and Create a New Project
Once you’ve signed up for MongoDB Atlas, you’ll be redirected to the Atlas Personalization page. This page will guide you through setting up your preferences, including selecting your cloud provider, project settings, and preferred cluster configuration. This is where you tailor the experience to your needs.

After completing the personalization step, click on the Finish button to proceed to the Atlas Dashboard.
Next, you’ll need to create a new project:
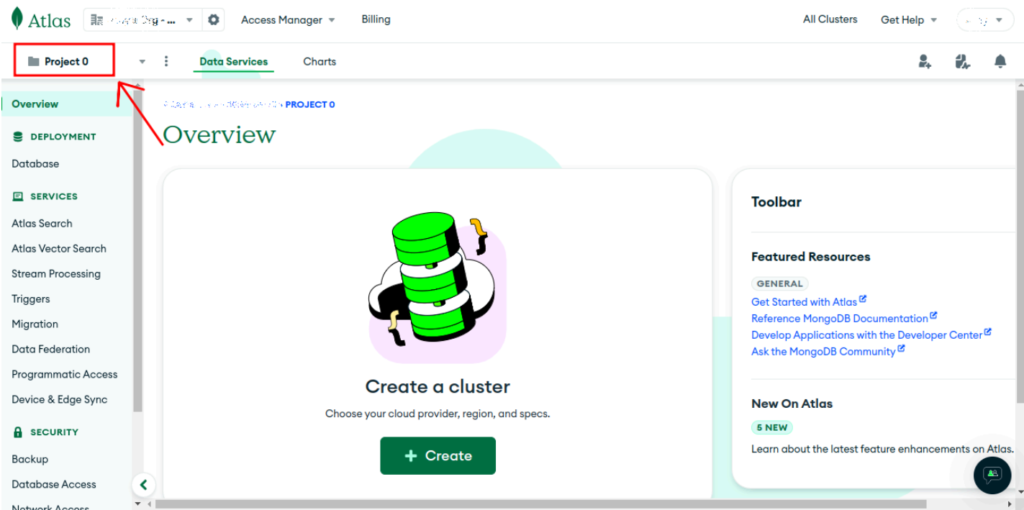
- In the Atlas dashboard, click on Project > New Project.
- Enter a name for your project (e.g., “My MongoDB Project”).
- You can choose to add collaborators to your project, but this step is optional. If you’re working solo, feel free to skip it.
- Once done, click Next to continue.

After completing these steps, you’ll be ready to begin deploying your MongoDB cluster.
Step 3: Deploy a New Cluster
To deploy your first cluster:
- In the project dashboard, click Build a Cluster.
- Choose your cloud provider (AWS, GCP, or Azure) and the region where your cluster will be hosted.
- Select the Cluster Tier. For beginners, the M0 Sandbox option is free and ideal for small projects or testing. It provides basic functionality for development. Note: The M0 Sandbox is a great option if you’re just starting out, but for larger applications, you might want to consider a more powerful tier.
- Customize your cluster by selecting instance size and storage as required.
- Once you’re happy with the configuration, click Create Cluster. This process can take several minutes.
A pop-up window will appear, auto-generating a Database Username and Password. You can customize these details, then click Create Database User.

Step 4: Configure Network Access
To ensure secure access to your database, configure your network settings:
- Once your cluster is created, go to the Security section in the left-hand menu and select Network Access.
- Add your IP address to the IP whitelist. Atlas will often show your current IP, or you can manually enter your IP address.Important: While you can allow access from anywhere by adding
0.0.0.0/0, this is not recommended for production environments due to security risks.
Step 5: Connect to Your Cluster
Now that your cluster is up and running, it’s time to connect:
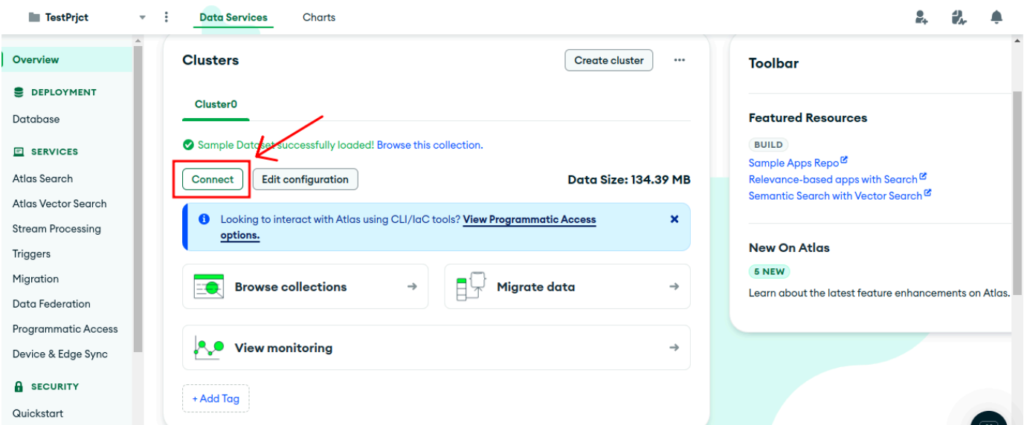
- In the Atlas dashboard, click the Connect button next to your cluster.

- Choose your connection method:
- Drivers: Use MongoDB’s native drivers for programming languages such as Java, Go, Node.js, or Python. Select the appropriate driver for your application and follow the instructions.
- Compass: MongoDB Compass is a GUI tool for managing your database. It allows you to manipulate, view, and analyze your data through an intuitive interface.
- Shell: MongoDB’s shell is a command-line interface that uses JavaScript to interact with your database. It is ideal for administrative tasks and running queries.
- MongoDB for VS Code: If you’re using Visual Studio Code, you can integrate MongoDB directly into your development environment for enhanced functionality, such as code completion and query building.
- Atlas SQL: If you prefer using SQL-based tools, Atlas SQL allows you to connect SQL analysis tools for querying your MongoDB data in a SQL format.
For most users, Connect with Your Application will provide the necessary connection string to integrate with your app. Simply copy the connection string, replace the placeholders (<username> and <password>) with your actual database credentials, and you’re ready to begin querying from your app.

Step 6: Monitor Your Cluster
After setting up your MongoDB cluster, it’s important to monitor its performance:
- Go to the Monitoring section in the dashboard to view metrics such as CPU usage, memory consumption, and disk space.
- You can also set up alerts to notify you if your cluster exceeds certain thresholds, such as high CPU usage or low disk space, so you can take action before performance issues arise.
Conclusion
Setting up MongoDB on Atlas is a straightforward process that only takes a few steps. Whether you’re building a personal project or scaling an enterprise application, MongoDB Atlas offers a robust, fully managed solution that scales with your needs. By following this tutorial, you’ll have your database up and running in no time, with the added benefit of automated backups, security, and easy management of your data.
