How to Manually Issue an SSL Certificate in RackNerd’s cPanel Shared Hosting
Leave a comment on How to Manually Issue an SSL Certificate in RackNerd’s cPanel Shared Hosting
Securing your website with an SSL certificate isn’t just about protecting data — it’s also about building trust with your visitors and improving your search engine rankings. At RackNerd, free SSL certificates powered by Let’s Encrypt are included with all shared and reseller hosting plans. These are typically issued automatically shortly after your domain is set up.
However, if you’d like to issue your SSL certificate manually — whether you’ve just added a new domain or you want to avoid waiting for the automated system — this guide will show you exactly how to do it using the SSL/TLS Status feature within cPanel.
Step 1: Log Into cPanel
Start by logging into your RackNerd cPanel hosting account. You can do this by visiting your Client Area, then navigating to your hosting service and clicking the “Login to cPanel” button.
Once you’re in the cPanel interface, look for the “SSL/TLS Status” icon. If you don’t see it right away, use the search bar at the top of the page to quickly locate it.

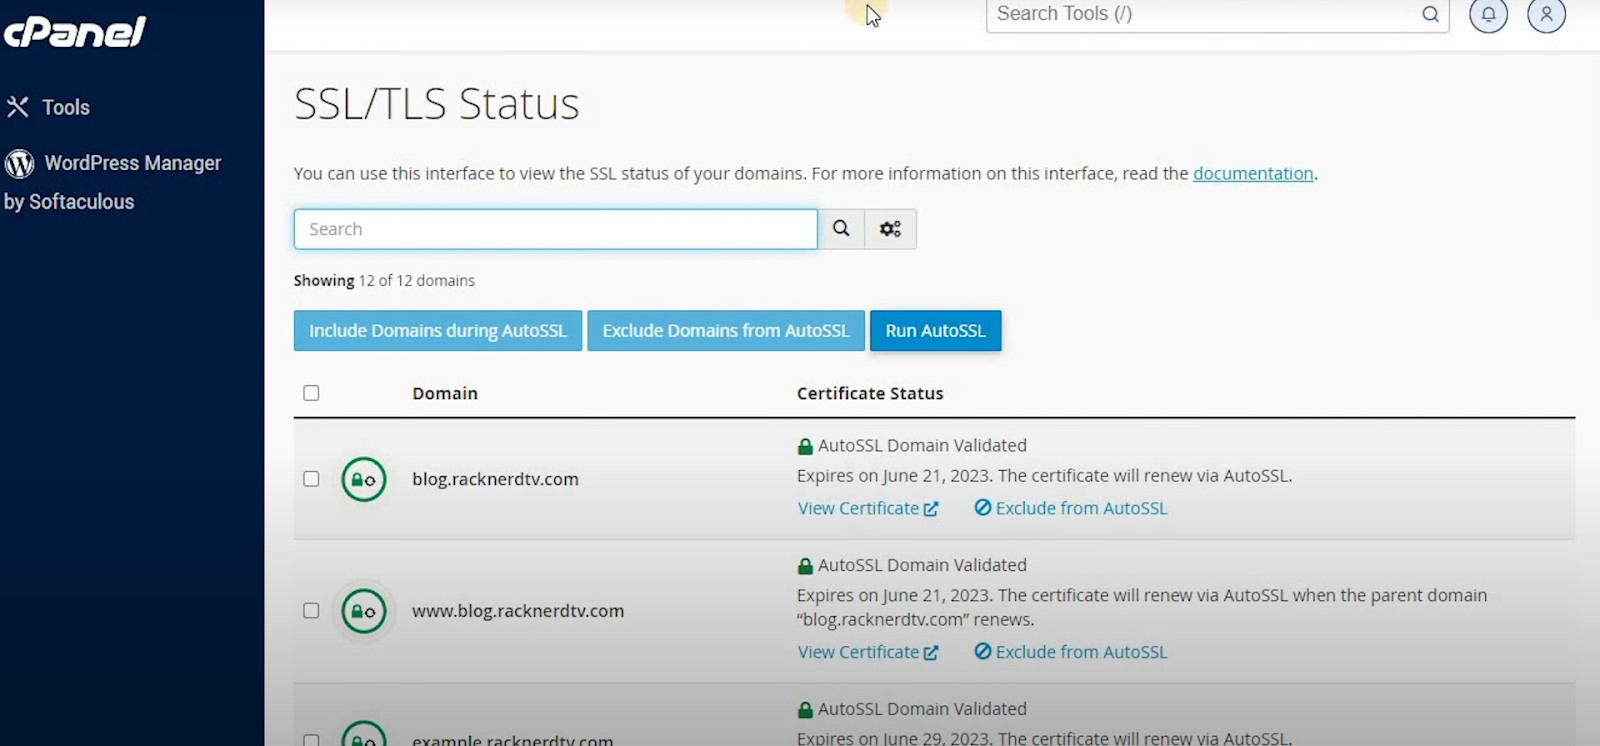
Step 2: Access SSL/TLS Status Page
Click on the SSL/TLS Status icon. This will bring you to a page displaying a list of all domains and subdomains currently associated with your hosting account.
Next to each domain, you’ll see its current SSL status — either secured (with a green check mark) or unsecured.
Step 3: Run AutoSSL Manually
To manually issue a free SSL certificate:
- Select the domain(s) for which you want to issue an SSL certificate.
- Click the “Run AutoSSL” button.
- Alternatively, if you’re working with multiple domains, you can select them all and click “Run AutoSSL For Selected Domains.”
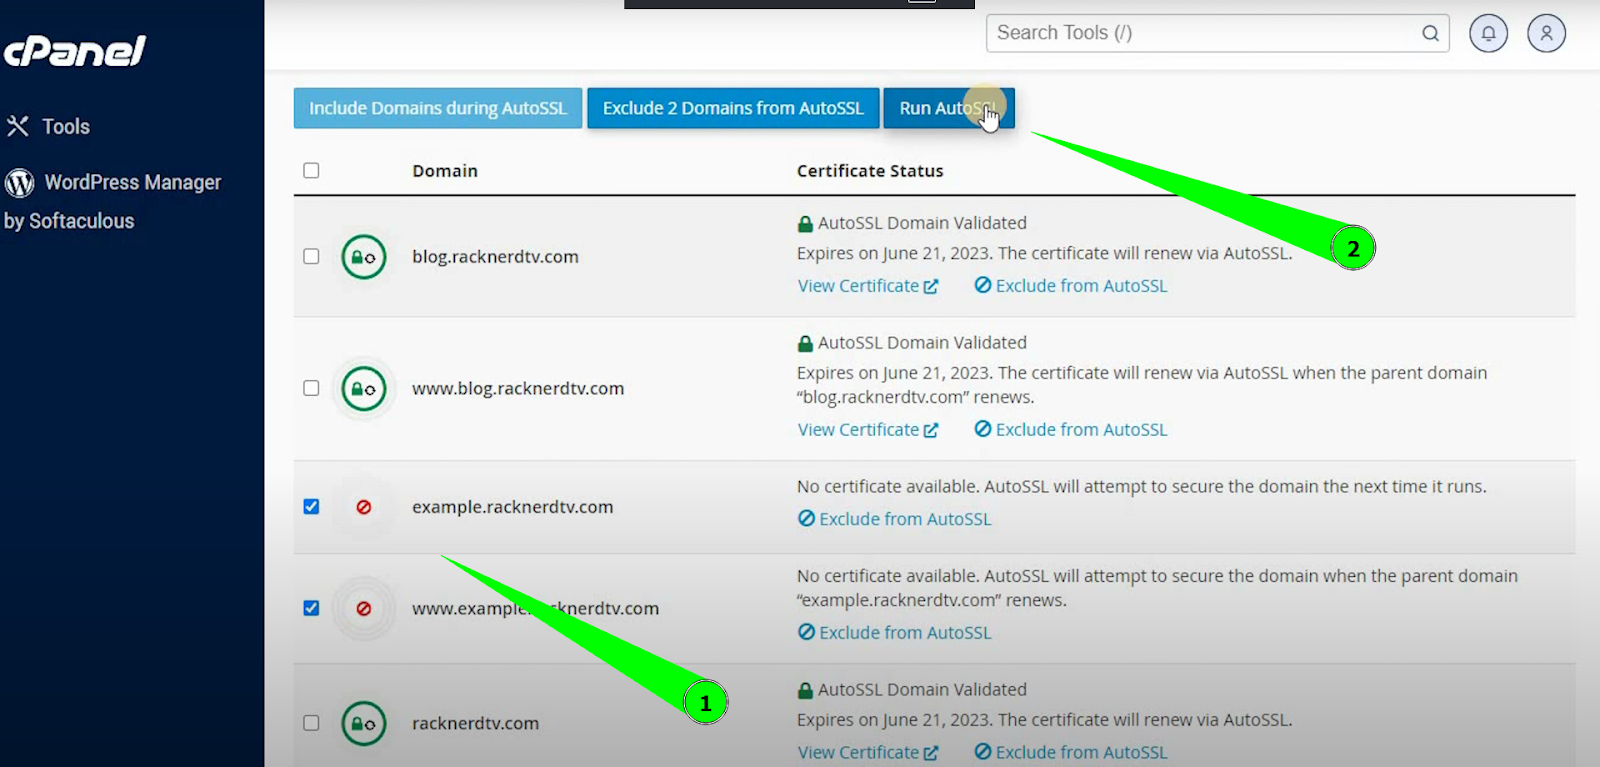
The system will then initiate a request to Let’s Encrypt to issue your SSL certificate. Depending on how many domains you’re securing and how busy the queue is, this process might take a few minutes.
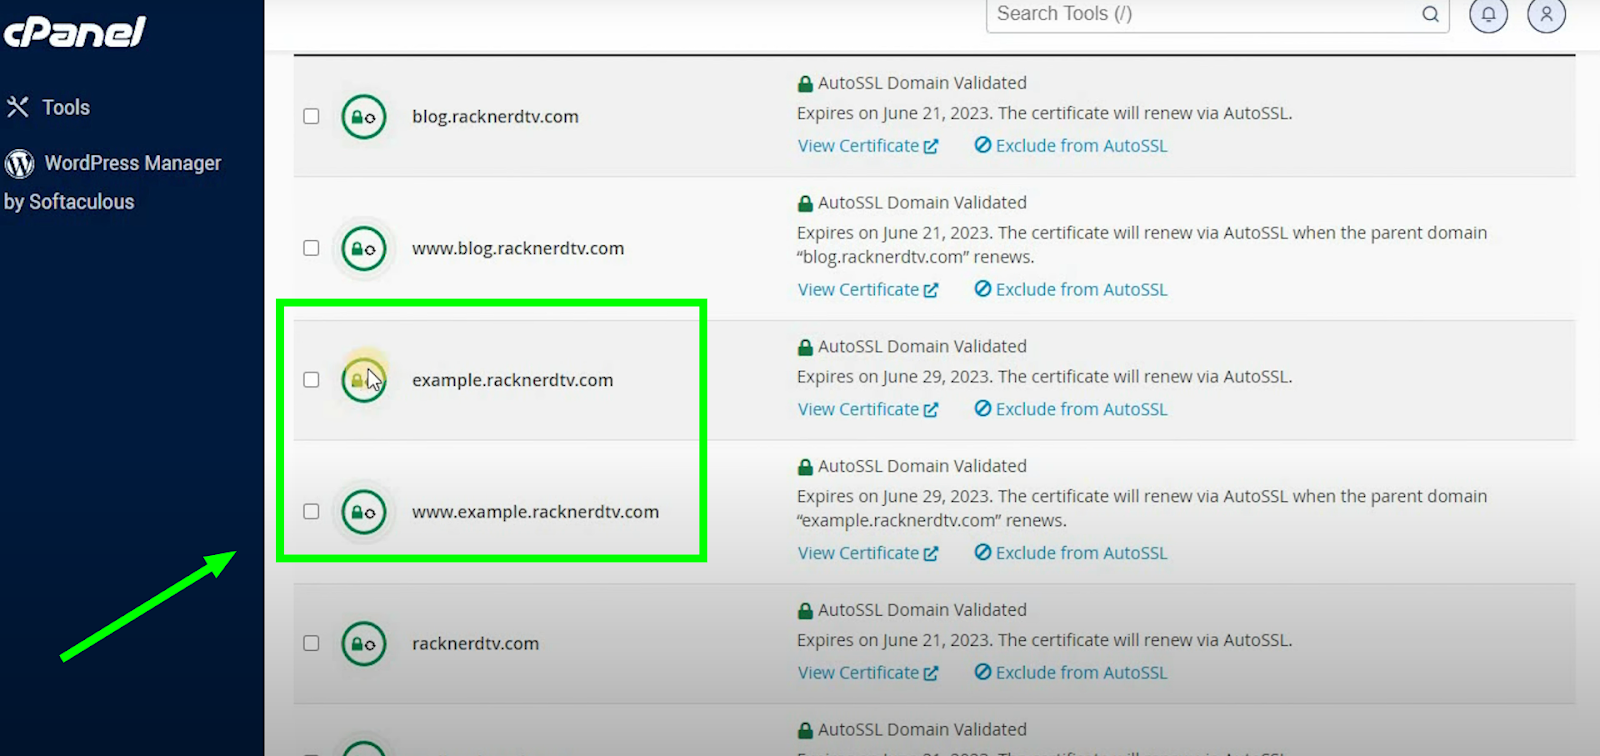
Once completed, the page will refresh with an update showing a green checkmark next to each domain that has been successfully secured with SSL.
Troubleshooting Common Issues
If you encounter an error during the process, the most common cause is DNS-related issues. Here are a few things to verify:
- Nameservers: Ensure your domain’s nameservers are pointed to RackNerd’s nameservers, which were included in your welcome email.
- DNS Propagation: After changing nameservers, it can take up to 72 hours for DNS to fully propagate, though most changes take effect much sooner.
- Subdomains: If you’re working with subdomains, confirm that they are correctly configured and resolving to your RackNerd hosting account.
If you’re still having trouble, our support team is available 24×7 and happy to assist — just reach out via [email protected].
Final Thoughts
Manually generating an SSL certificate using the SSL/TLS Status feature in cPanel is a quick and effective way to secure your domains without waiting on automation. Once installed, your visitors will see the padlock icon in their browser — a sign of trust and security.
With RackNerd’s shared and reseller hosting, you not only get free Let’s Encrypt SSL certificates, but also the peace of mind knowing that support is just an email away whenever you need help.
Ready to get started? Log into cPanel and secure your site today!