How to Install OpenCart in your Server for E-Commerce
Leave a comment on How to Install OpenCart in your Server for E-Commerce

OpenCart is a powerful and user-friendly open-source e-commerce platform. With its simple interface, robust features, and support for a wide range of extensions, it’s an excellent choice for launching your online store. If you’re ready to install OpenCart on your server, follow this comprehensive guide.
Pre-requisites
- Web Hosting: A server with Apache, Nginx, or another supported web server.
- PHP: Version 7.4 or later, along with necessary extensions like cURL, zip, mbstring, and gd.
- Database: MySQL or MariaDB with a user and an empty database created.
- Domain Name: Linked to your server’s IP address.
- FTP Client: Tools like FileZilla to upload files to your server.
- OpenCart Files: Download the latest version of OpenCart from the official website https://www.opencart.com/
Step 1 – Prepare Your Server
Update all the System Packages to make sure your Ubuntu server is up-to-date.
sudo apt update && sudo apt upgrade -y
Install Required Software:
sudo apt install apache2 php libapache2-mod-php mariadb-server unzip curl php-curl php-zip php-mbstring php-gd -y
Enable Apache Modules:
sudo a2enmod rewrite
sudo systemctl restart apache2
Step 2 – Create a Database for OpenCart
Login to MySQL:
sudo mysql -u root -p
Create a Database and User:
CREATE DATABASE opencart_db;
CREATE USER ‘opencart_user’@’localhost’ IDENTIFIED BY ‘password’;
GRANT ALL PRIVILEGES ON opencart_db.* TO ‘opencart_user’@’localhost’; FLUSH PRIVILEGES;
EXIT;
Replace ‘password’.
Step 3 – Download OpenCart Directly to Your Server
Use the ‘wget’ command to download the latest version of OpenCart directly from its official repository:
cd /var/www/html
wget https://github.com/opencart/opencart/releases/download/4.1.0.0/opencart-4.1.0.0.zip
Make sure to replace the URL with the latest file from ‘https://www.opencart.com/index.php?route=cms/download’
Extract the Archive:
unzip opencart-3.x.x.x.zip -d /var/www/html/
(Make sure to replace ‘opencart-3.x.x.x.zip’ with the actual file.)
Move Files to the Document Root:
If OpenCart extracts into a subdirectory (like upload), move its contents to the root directory:
mv /var/www/html/upload/* /var/www/html/
rmdir /var/www/html/upload
Set Correct Permissions:
sudo chown -R www-data:www-data /var/www/html/
sudo chmod -R 755 /var/www/html/
Step 4 – Configure OpenCart
Rename Configuration Files:
mv /var/www/html/config-dist.php /var/www/html/config.php
mv /var/www/html/admin/config-dist.php /var/www/html/admin/config.php
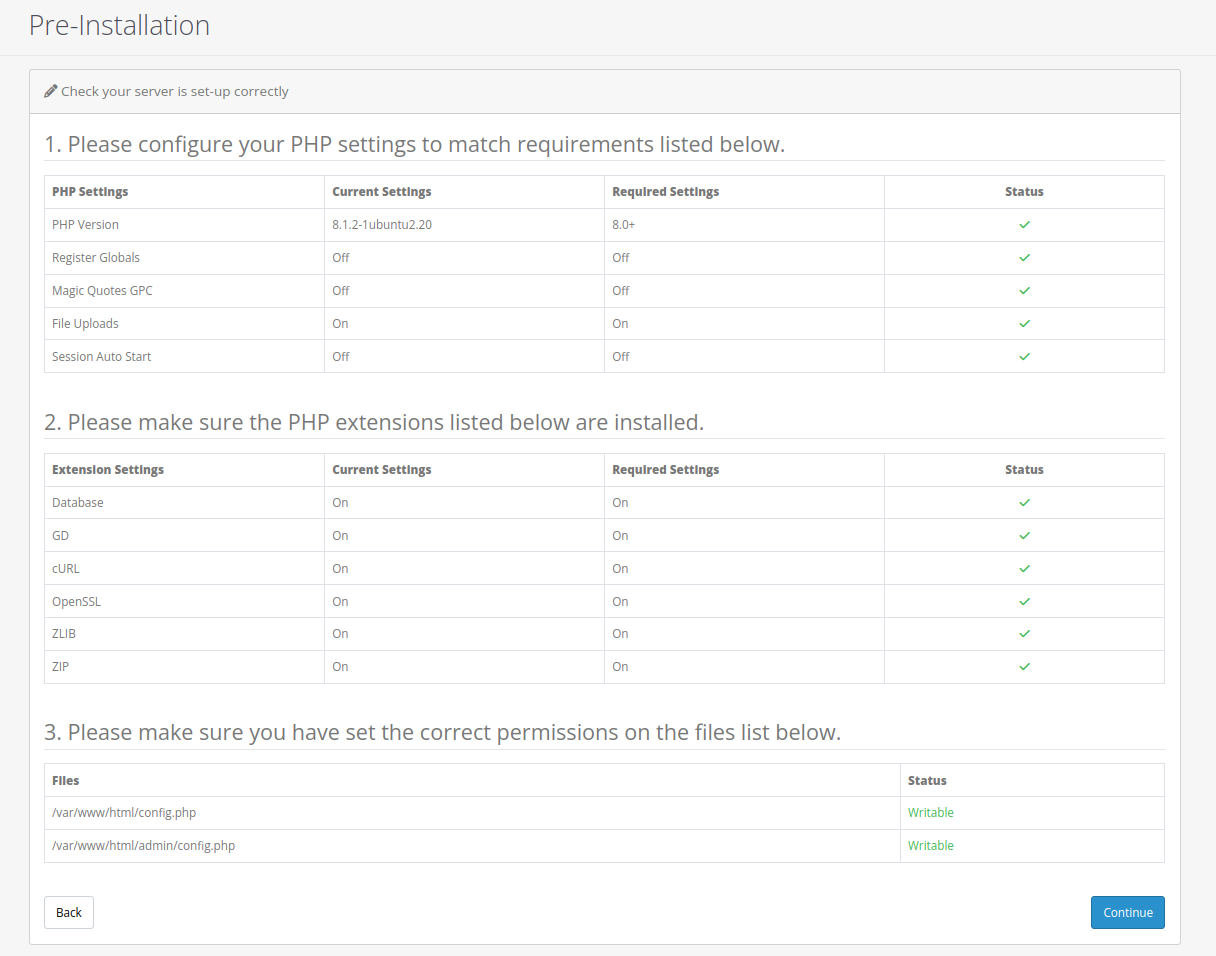
Access the Installation Wizard:
Open your browser and navigate to your domain (e.g., http://yourdomain.com) or (http://serverip)
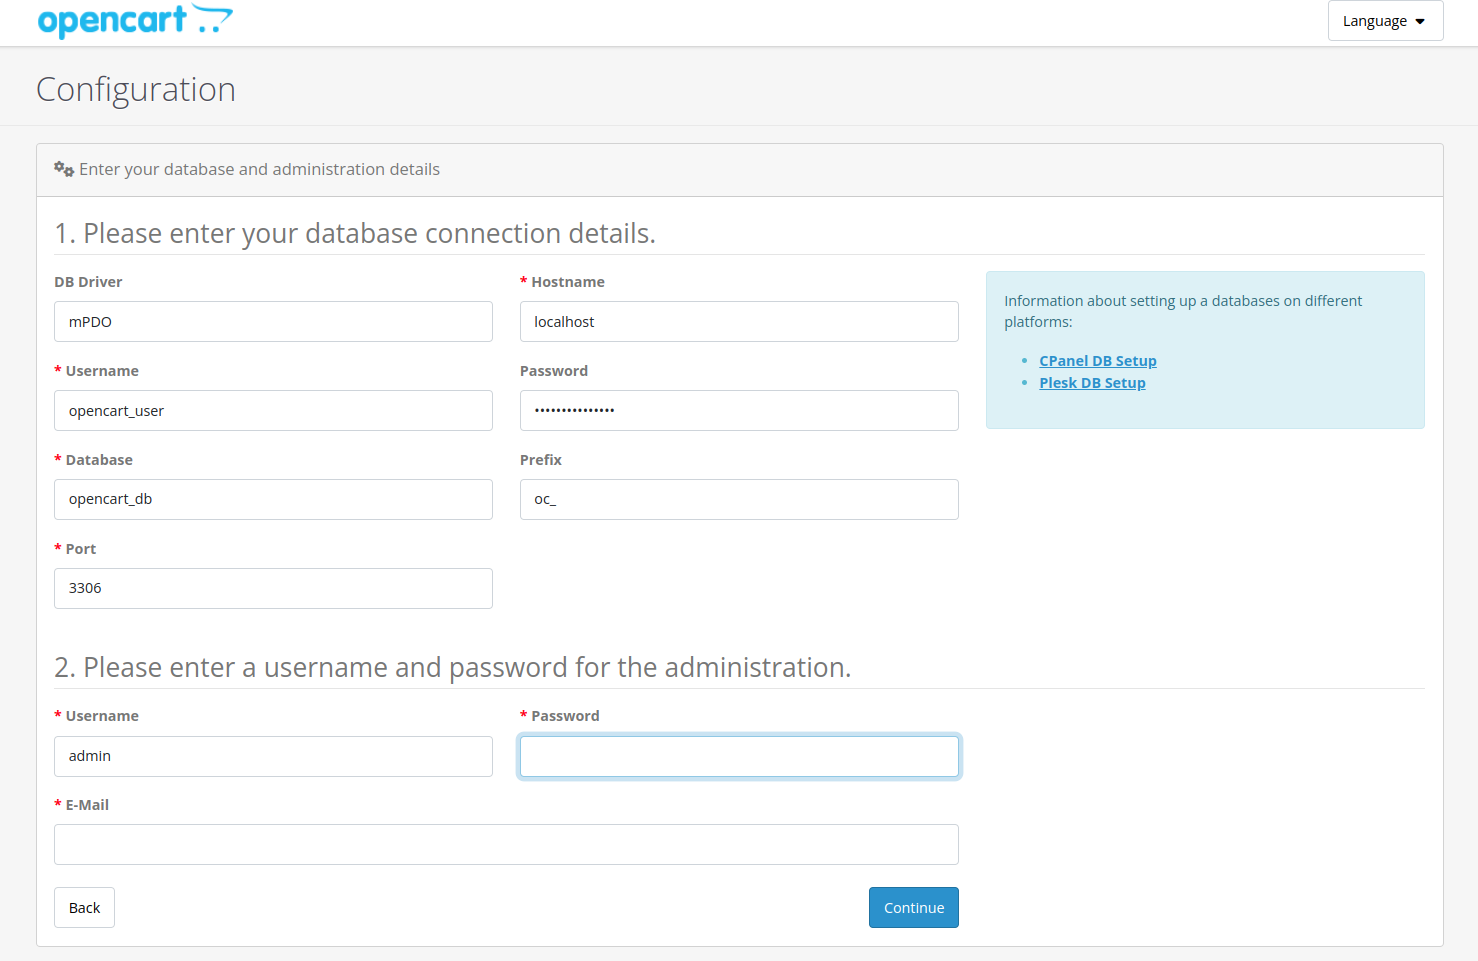
Follow the on-screen instructions:
- Check server requirements.
- Enter database credentials (use the database name, username, and password created earlier)
- Configure your admin username and password.

Step 5 – Secure Your Installation
Remove the Install Directory:
sudo rm -rf /var/www/html/install
Enable SSL:
obtain an SSL certificate (use Let’s Encrypt or purchase one).
Step 6 – Customize Your Store
Login to Admin Panel:
Go to http://yourdomain.com/admin. Or http://IP_address/admin.
Use the admin credentials you set during installation.
Install Extensions:
Browse the OpenCart Marketplace for themes and modules.
Add Products and Categories:
Use the admin dashboard to populate your store with products.
Conclusion
By following this guide, you’ll have successfully installed and configured OpenCart on your server. With your platform complete, you can begin constructing your online store and customizing it to match your specific requirements. Don’t forget to safeguard your store with regular updates, backups, and an SSL certificate to ensure that your consumers have a safe purchasing experience.