Changing Your VPS Primary IPv4 Address with RackNerd
Leave a comment on Changing Your VPS Primary IPv4 Address with RackNerd
UPDATE — This new feature is now available for your use. Please read on to learn more!
We are pleased to announce a new feature that is now available for all RackNerd VPS customers — the ability to change your VPS IPv4 address via the self-serve Client Portal. This allows you to change your VPS’s primary IPv4 address, without the need to contact support.
Our VPS IP replacement policy remains unchanged – in summary, we offer a free IP change if it is requested within the first 72 hours, and it is $3 per IP change thereafter.
Please be aware that this feature is to automatically replace your main VPS IP with a new one. This is NOT to be confused with an additional IPv4 request. If you want to order additional IPs, please open a ticket with our sales department.
Requirements:
- There must be no open support tickets regarding the VPS service in question, otherwise, the Change IP button will be unavailable to avoid any conflicts
- The VPS service must be in an active status, otherwise, the Change IP button will be unavailable
- There must be no unresolved abuse cases under your account
Once you’ve ensured that you met the above requirements, please continue reading to learn how to change your VPS primary IPv4 address automatically:
Step #1: Log into the RackNerd client area at https://my.racknerd.com/clientarea.php
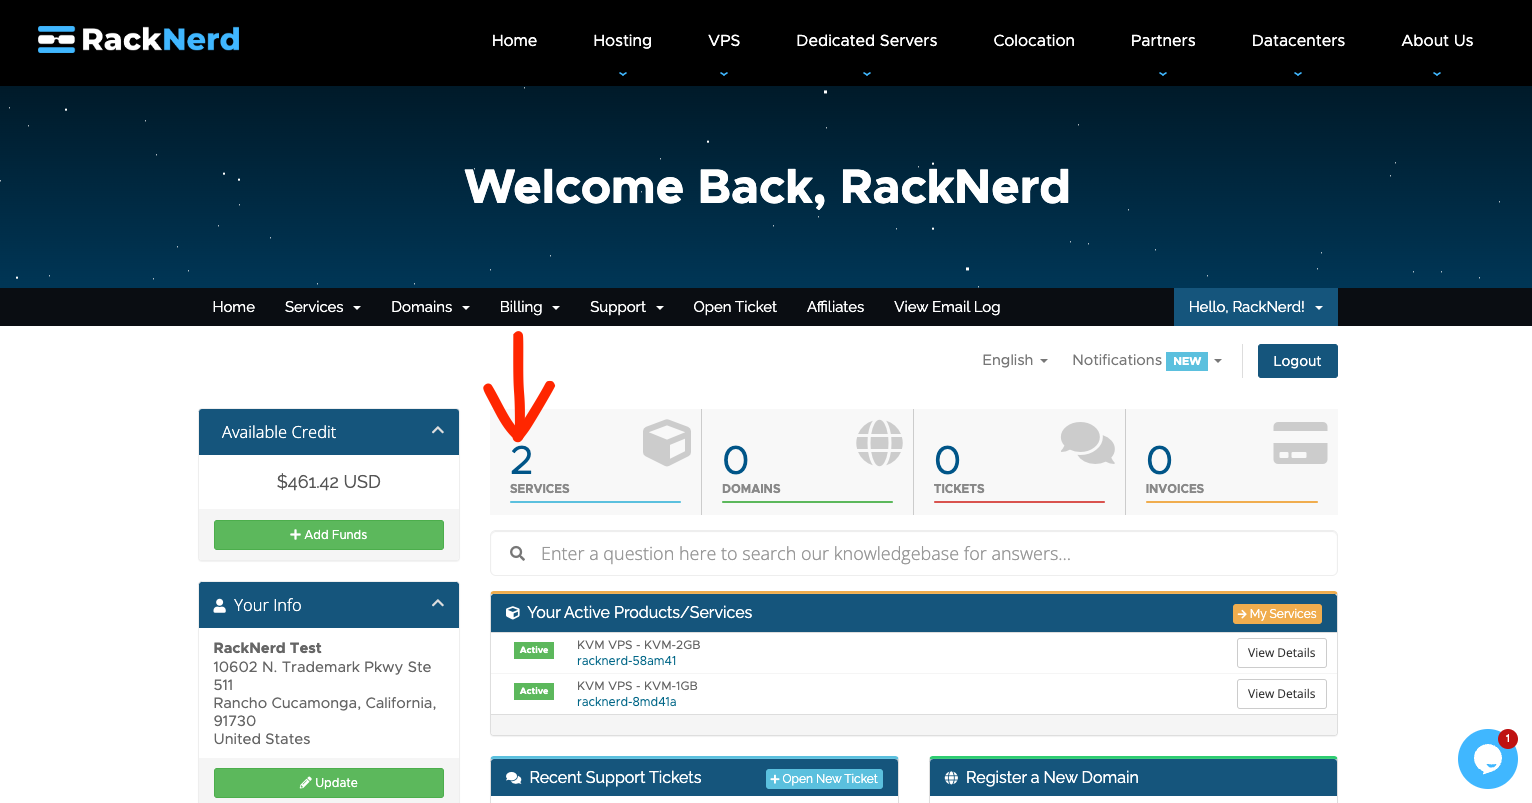
Step #2: Click on the Services tab, as shown in the arrow below:
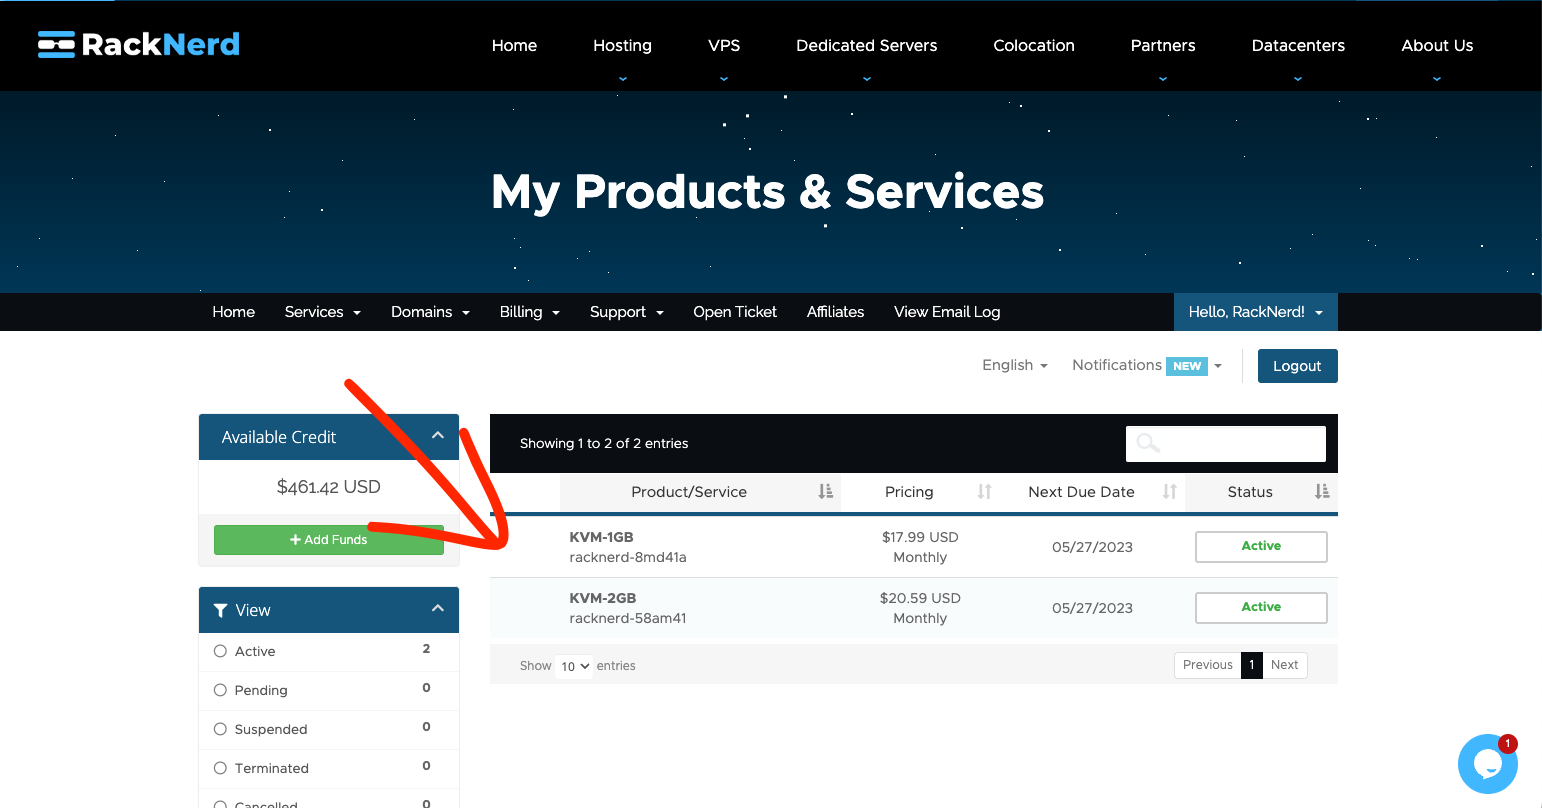
Step #3: You will now be directed to the Services List page, where you can click on the VPS you wish to change the VPS IP on. Click on it, and allow several seconds for the page to fully load.
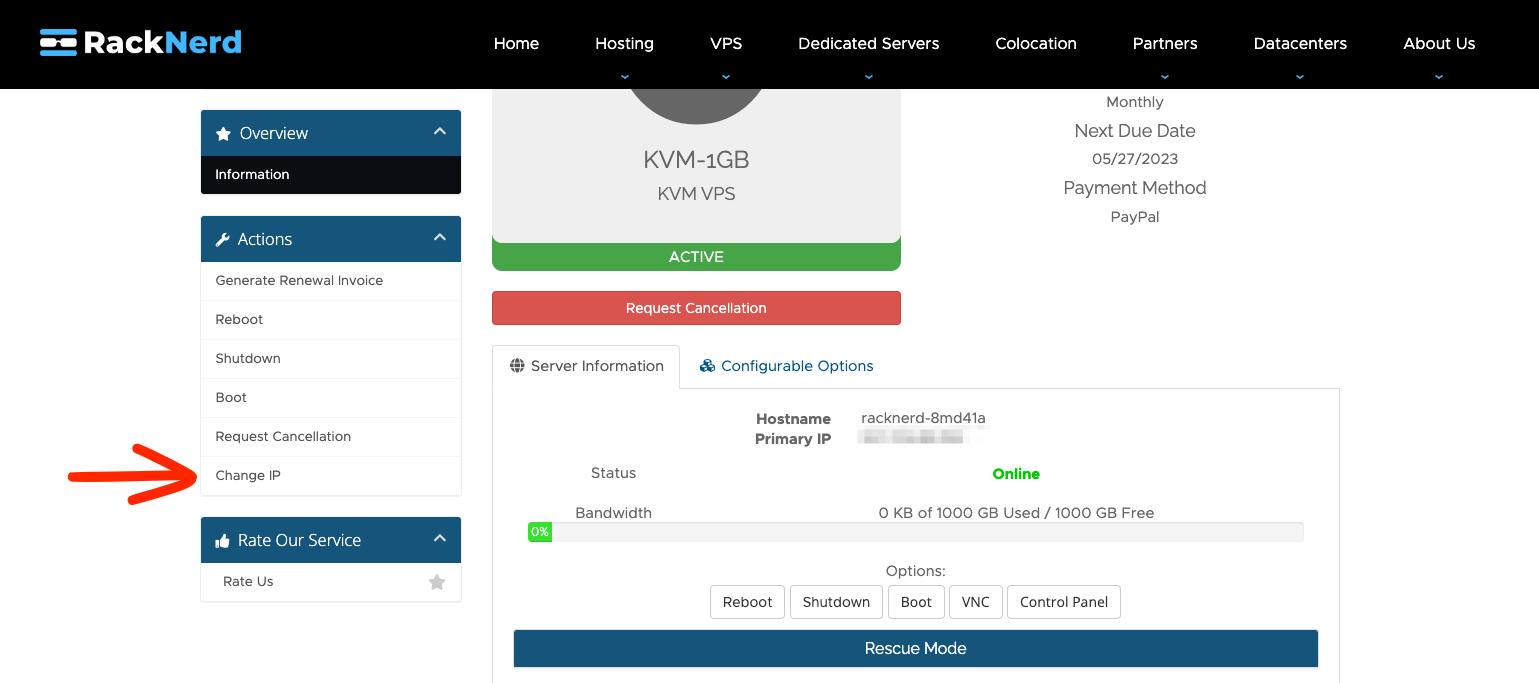
Step #4: After selecting the VPS, click on the “Change IP” button, located under the Actions section on the left-hand side (arrow shown below for reference)
Step #5: After clicking on the “Change IP” button, you will be directed a prompt that reminds you of our IPv4 replacement policy. From here, you can either Go Back, or Proceed. In this case, press the green “Proceed” button.

Step #6: After pressing the Proceed button, if you are requesting your first IP change within the first 72 hours, the VPS IP will be replaced automatically, and a support ticket will be created under your account with your new VPS IP details within a few minutes. If you are requesting this after 72 hours, or if you already utilized your free IP change within the first 72 hours, you will be directed to a $3 invoice. Once that invoice is paid, then the change IP request will process automatically within a few minutes of completed payment, and then a support ticket will be created under your account with the new VPS IP details.
Please note: During the IP change process, it is normal for the page to take about a minute to load. Just be patient, and hang tight 🙂
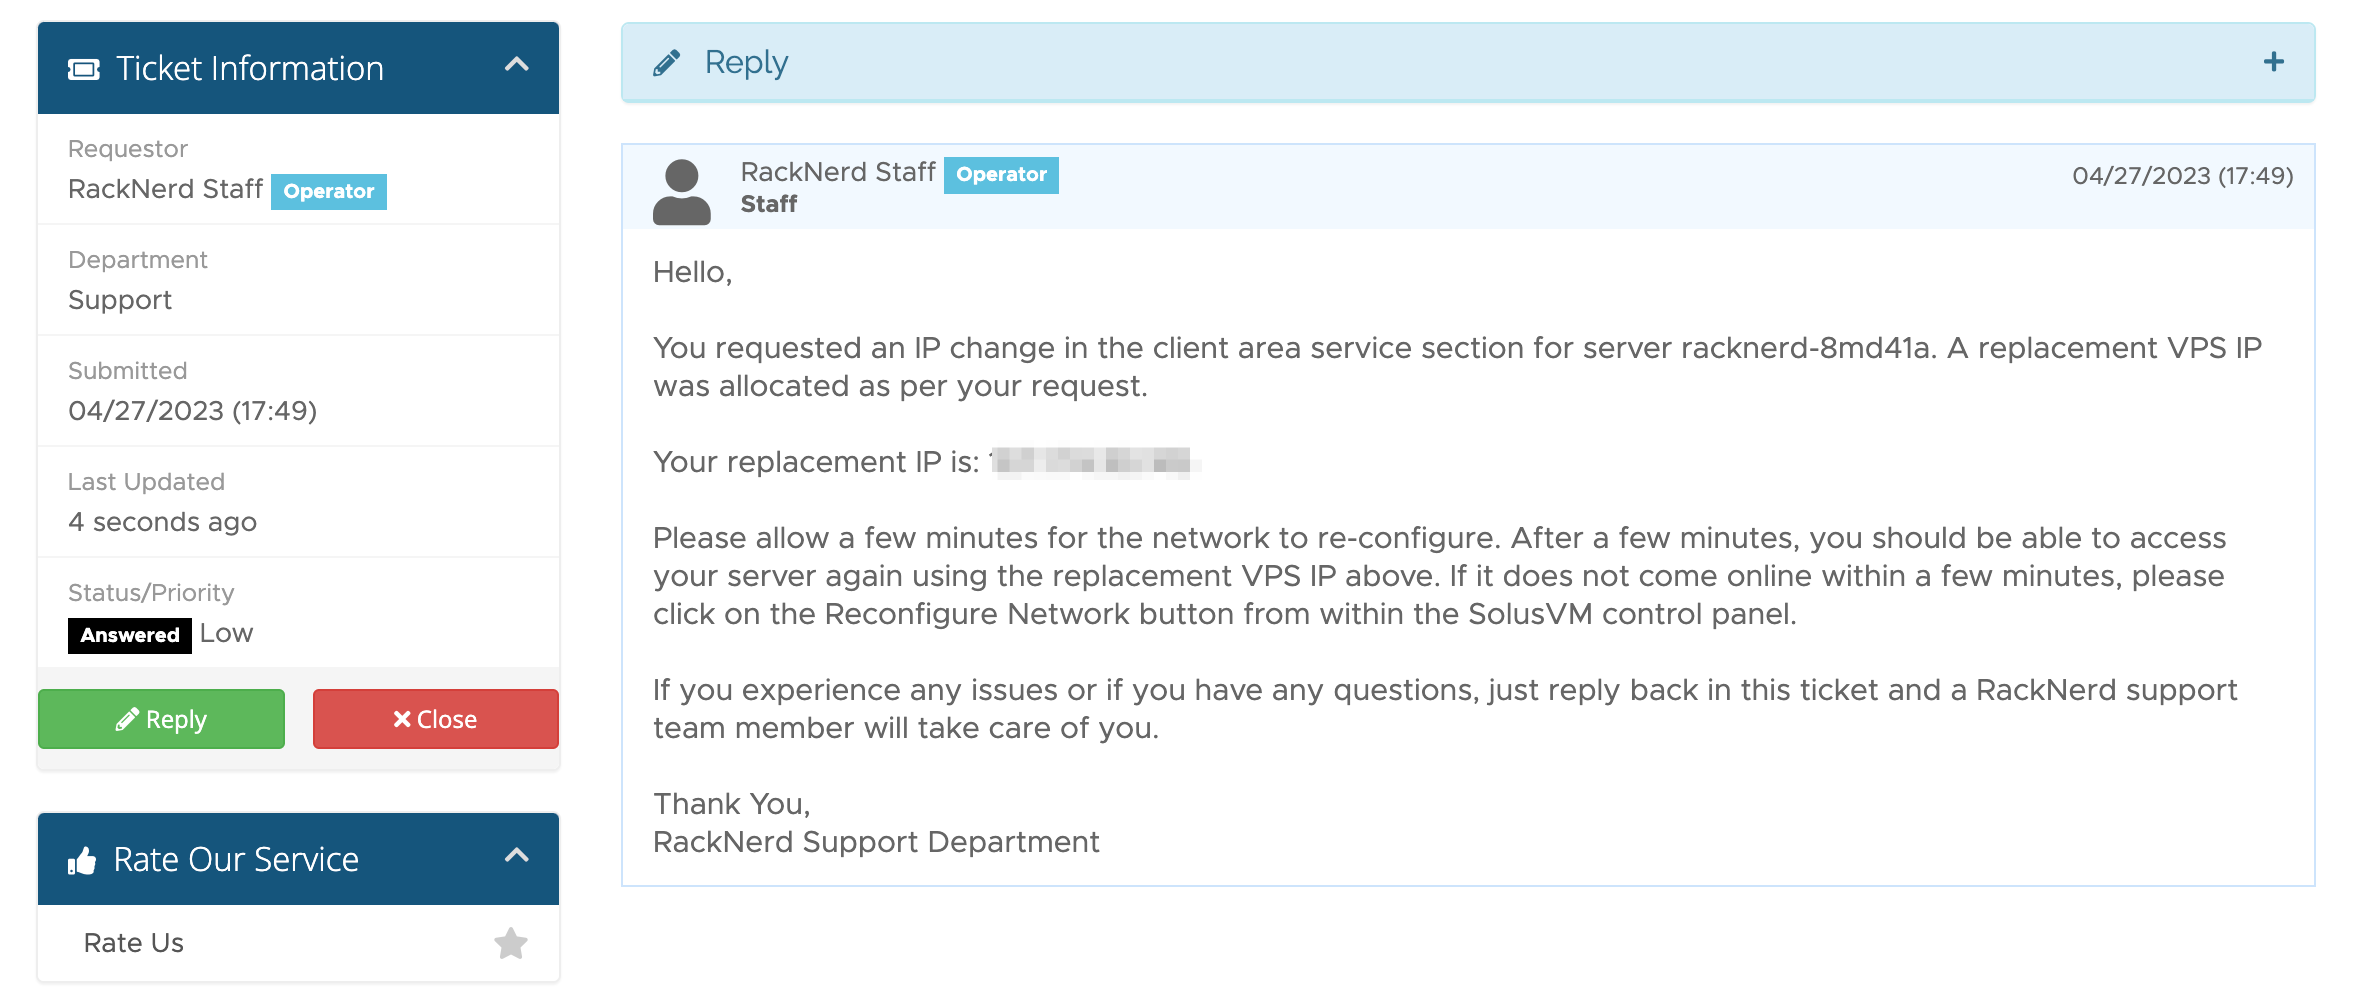
Step #7: Once it is done, head on over to the Support Tickets page, located at: https://my.racknerd.com/supporttickets.php
Click on the new ticket that was just created.
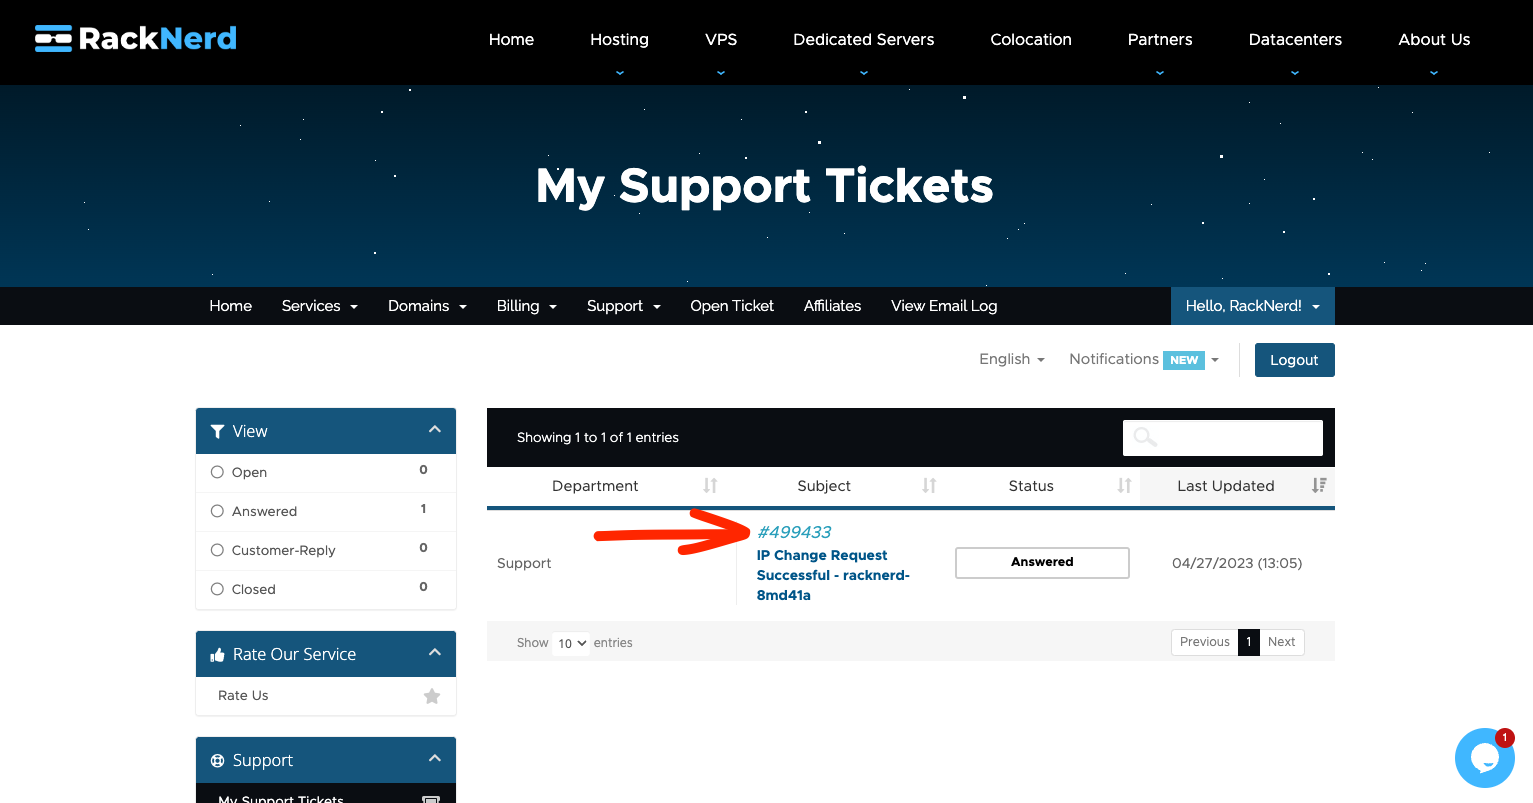
Step #8: From here you can know your new VPS IPv4 address details (you will also receive an email with this for easy future reference)