How to Install WordPress Automatically with myVestaCP
Leave a comment on How to Install WordPress Automatically with myVestaCP
Setting up a WordPress site on a VPS can sometimes feel overwhelming, but with myVestaCP, the process is incredibly simple. Thanks to the built-in v-install-wordpress script, you can deploy WordPress with just one command. Whether you’re launching a personal blog, a portfolio site, or an e-commerce store, myVestaCP streamlines the process—and the best part? It’s completely free!
Prerequisites
Before we begin, ensure that myVestaCP is installed on your VPS. If you haven’t set it up yet, check out our previous tutorial about installing myVestaCP on our Youtube channel. Once that’s done, follow these steps to get WordPress up and running in no time.
Step 1: Add Your Domain in myVestaCP
- Log in to your myVestaCP dashboard.
- Click on “WEB” from the top menu.
- Click “Add Domain” and enter your domain name.
- Leave the default settings as they are and click “Add”.

Once the domain is added, we’ll set up an SSL certificate using Let’s Encrypt.
Step 2: Enable SSL for Your Domain
- Navigate to your domain settings in myVestaCP.
- Enable SSL Support and Let’s Encrypt SSL.
- Click Save to apply the changes.
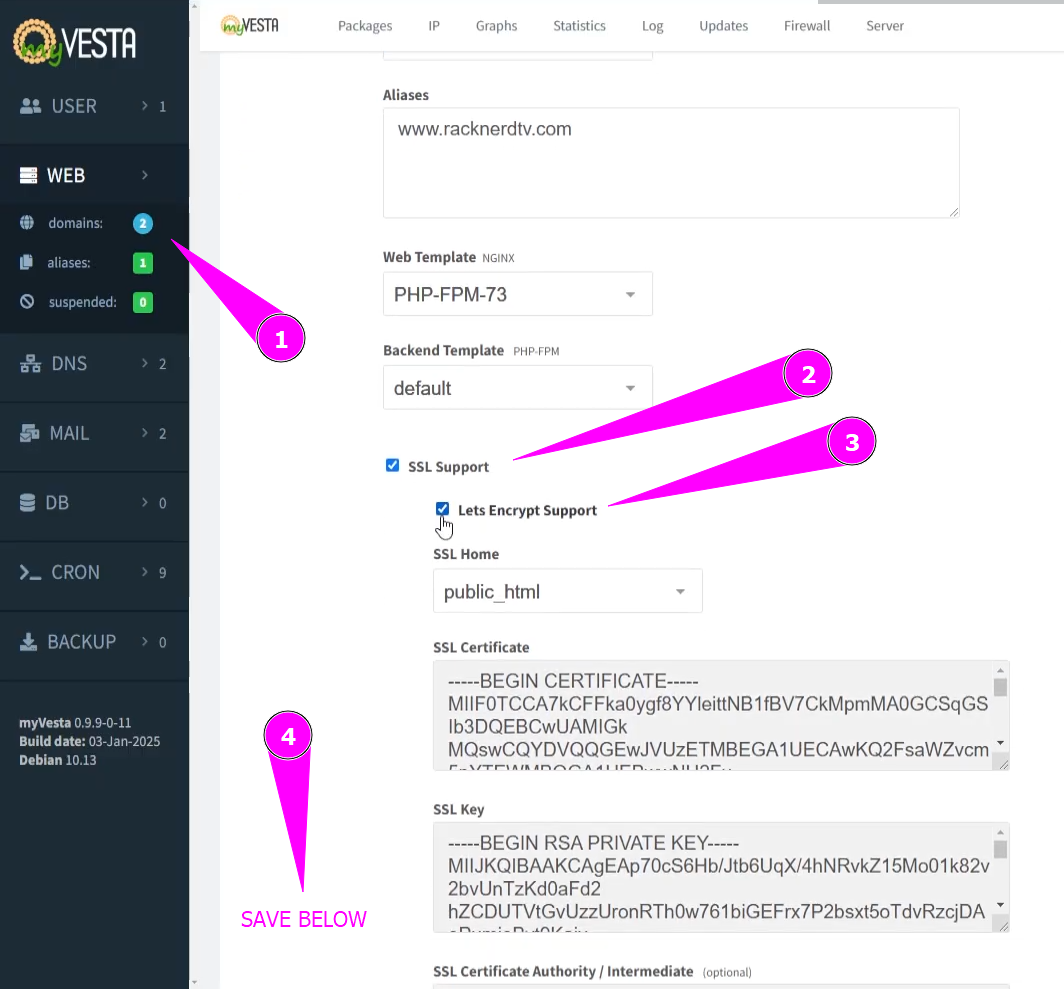
This step ensures that your website runs on HTTPS, improving security and trustworthiness.
Step 3: Install WordPress Using the One-Command Script
Now, let’s install WordPress via SSH.
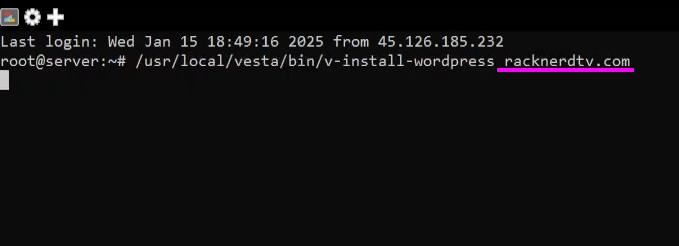
- Open an SSH client and connect to your VPS.
- Run the following command, replacing yourdomain.com with your actual domain:
/usr/local/vesta/bin/v-install-wordpress yourdomain.com
This single command will:
- Create a new database
- Install WordPress files
- Provide you with login credentials for WordPress
Important Note: This script will delete all files in the public_html folder of your domain. If you’re starting fresh or don’t need existing files, proceed without worries.
Step 4: Access Your WordPress Dashboard
After running the command, you’ll see a message similar to this:
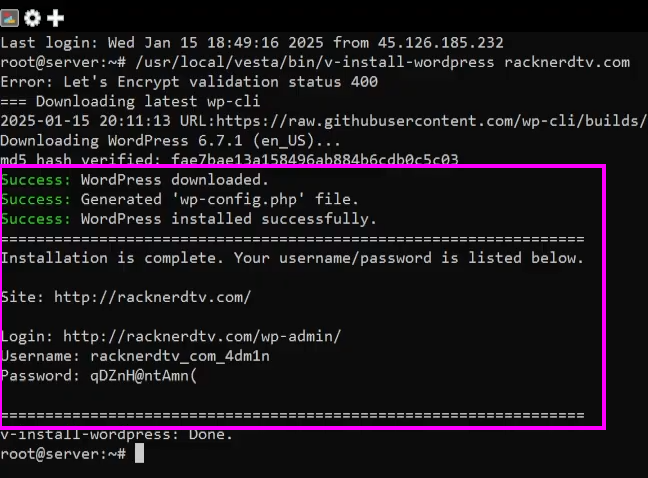
Be sure to copy these credentials and store them securely.
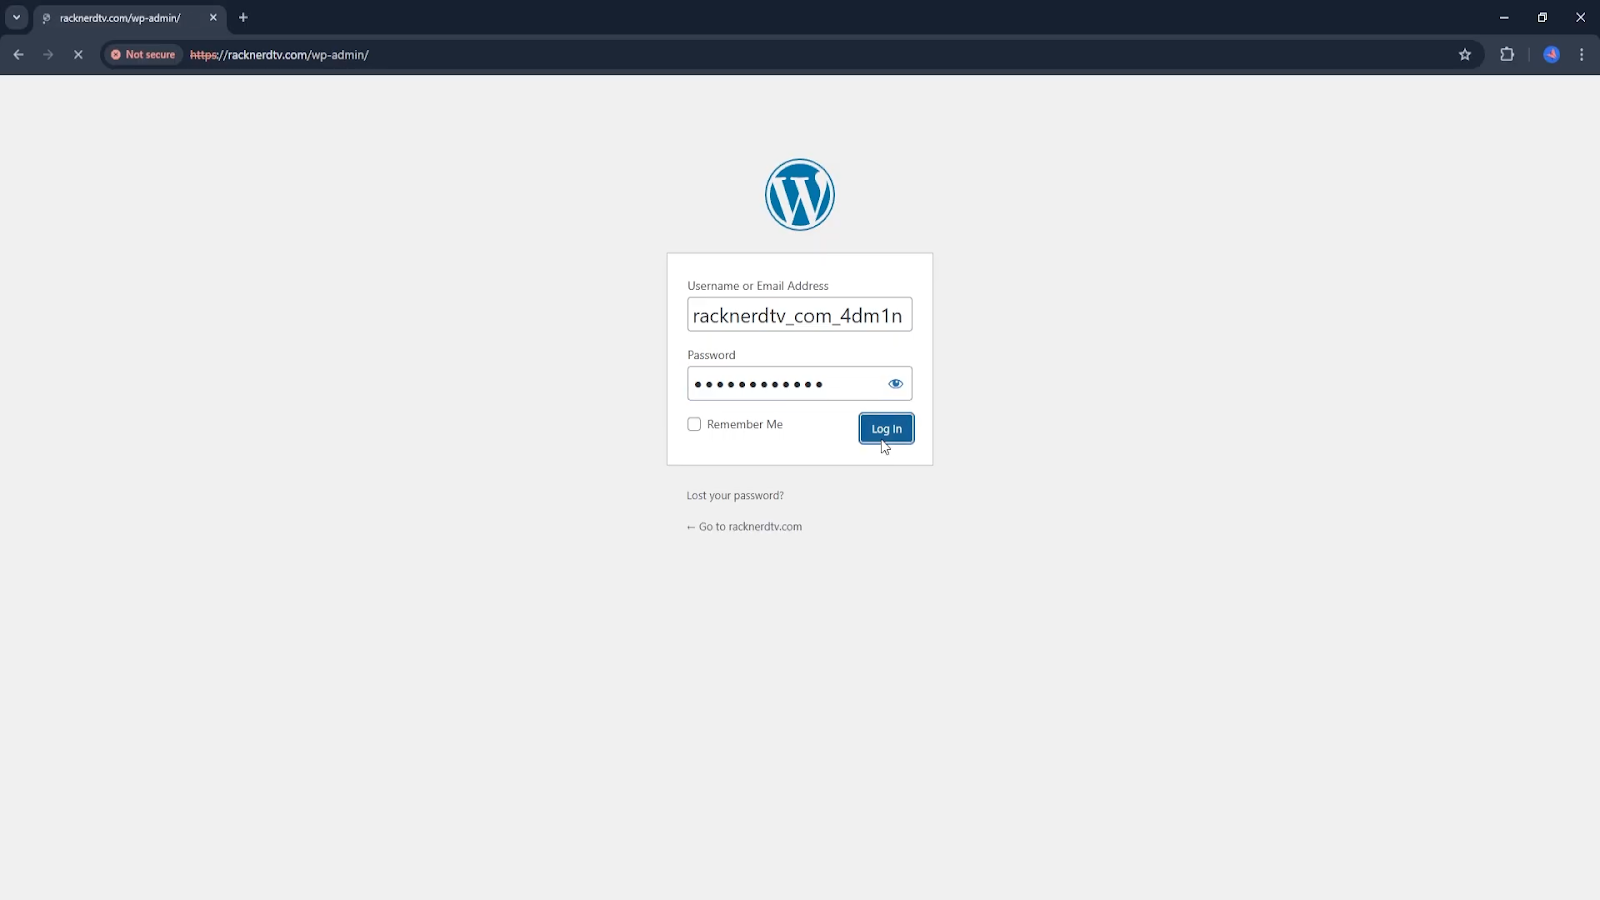
Now, you can log in to your WordPress admin panel by visiting http://yourdomain.com/wp-admin and entering the credentials provided. Your WordPress site is now fully set up and ready to be customized!
Conclusion
With myVestaCP, installing WordPress is as easy as running a single command. This streamlined process saves time and effort, allowing you to focus on building and managing your website.
For a smooth and reliable hosting experience, consider RackNerd’s VPS hosting. Our high-performance VPS solutions provide the perfect environment for running myVestaCP, ensuring fast, secure, and hassle-free WordPress deployments. Explore our VPS hosting plans at RackNerd.com and take your website to the next level!