How to Install Elasticsearch on Ubuntu Server
Leave a comment on How to Install Elasticsearch on Ubuntu Server
Introduction
Elasticsearch is a powerful, open-source analytics and search engine designed for processing log and event data. It allows you to search, analyze, and visualize large volumes of data quickly and in near real-time. In this tutorial, we will guide you step by step through the process of installing Elasticsearch on an Ubuntu server.
Step 1: Update System Packages
Before installing any software, it’s important to ensure that your Ubuntu server is up to date. Run the following commands to update all system packages:
sudo apt update
sudo apt upgrade -y
Step 2: Install Java
Elasticsearch requires Java to run. OpenJDK 11 is a commonly used version and is well-supported for Elasticsearch. To install OpenJDK 11, run:
sudo apt install openjdk-11-jdk -yVerify that Java has been installed successfully by checking the version:
java -version
Step 3: Add the Elasticsearch Repository
To install Elasticsearch, you must first add the official Elasticsearch GPG key and repository to your system. Follow these steps:
- Add the GPG key:
curl -fsSL https://artifacts.elastic.co/GPG-KEY-elasticsearch | gpg --dearmor | sudo tee /usr/share/keyrings/elasticsearch-keyring.gpg > /dev/null- Add the Elasticsearch repository:
echo "deb [signed-by=/usr/share/keyrings/elasticsearch-keyring.gpg] https://artifacts.elastic.co/packages/8.x/apt stable main" | sudo tee /etc/apt/sources.list.d/elastic-8.x.list
Step 4: Install Elasticsearch
Now that the repository has been added, update the package list again and install Elasticsearch:
sudo apt update
sudo apt install elasticsearch -y
Step 5: Configure Elasticsearch
The main configuration file for Elasticsearch is located at /etc/elasticsearch/elasticsearch.yml. You can modify this file to adjust settings based on your needs.
Key settings you may want to adjust:
- Cluster Name: Specify the name of your Elasticsearch cluster.
- Node Name: Assign a unique name to the node within the cluster.
- Network Host: By default, Elasticsearch is accessible only from localhost. To allow external access, change this setting to
0.0.0.0or the IP address of your server.
If you are setting ‘network.host‘ as 0.0.0.0 or the IP address, update the ‘cluster.initial_master_nodes‘ with the with the IP addresses of your cluster’s master-eligible nodes.
For example, in elasticsearch.yml, you can modify the following:
network.host: 0.0.0.0
cluster.initial_master_nodes: ["your-server-ip"]
This change allows external clients to connect to your Elasticsearch instance.
Step 6: Start and Enable Elasticsearch
Once you’ve configured Elasticsearch, start and enable the service to run on system boot:
sudo systemctl start elasticsearch
sudo systemctl enable elasticsearch
Step 7: Verify the Installation
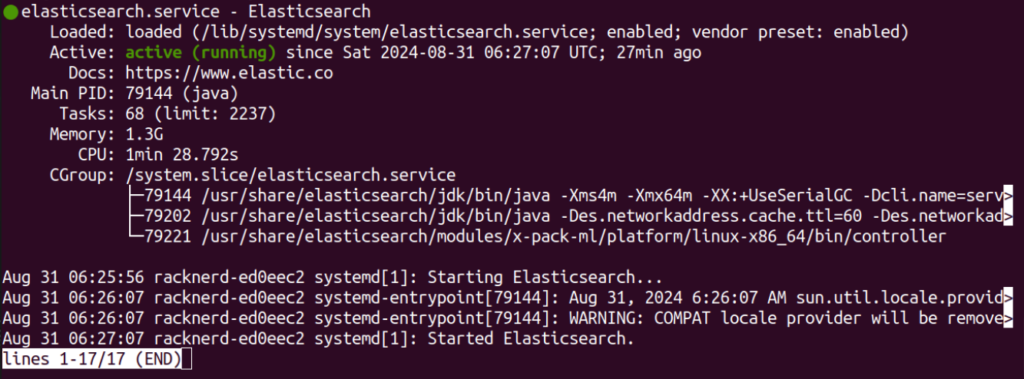
To ensure Elasticsearch is running properly, check the status of the service:
sudo systemctl status elasticsearch
You can also verify Elasticsearch by sending an HTTP request:
curl -X GET "localhost:9200/"If Elasticsearch is running, you should see a JSON response containing information about your Elasticsearch node.
Step 8: Set Up Authentication
Elasticsearch comes with a built-in user called elastic. For security, you may want to reset the password for this user. Run the following command to reset the password:
sudo /usr/share/elasticsearch/bin/elasticsearch-reset-password -u elasticThis command will display the new password in the terminal.

Step 9: Access Elasticsearch
You can access Elasticsearch through your web browser by navigating to:
http://your-server-ip:9200If the installation was successful, you should see a JSON response with information about your Elasticsearch node.

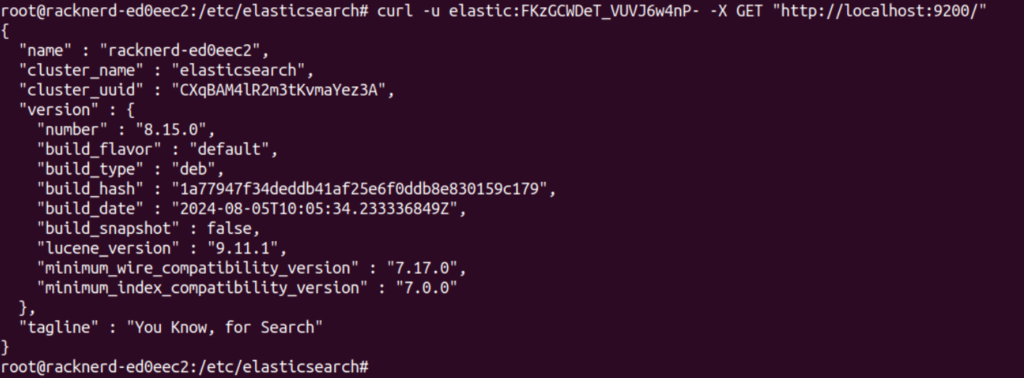
Alternatively, you can test the connection via the terminal by using the curl command:
curl -u elastic:PASSWORD -X GET "http://localhost:9200/"Be sure to replace PASSWORD with the actual password you set for the elastic user.

Conclusion
By following this guide, you’ve successfully installed Elasticsearch on your Ubuntu server. You can now take advantage of Elasticsearch’s powerful search and analytics capabilities for tasks such as real-time analytics and full-text search.
Remember to keep your Elasticsearch instance updated and secure by regularly checking for new releases and applying any necessary security patches. With proper configuration and monitoring, Elasticsearch can provide robust, scalable search solutions for a variety of use cases.
