How to Deploy a Python App on an Ubuntu Server (VPS or Dedicated)
Leave a comment on How to Deploy a Python App on an Ubuntu Server (VPS or Dedicated)
Deploying a Python application on an Ubuntu server, whether it’s a VPS or dedicated server, is a powerful way to take full control of your application’s environment. With a dedicated server, you have maximum resources at your disposal, while a VPS offers flexibility and cost-effectiveness. Both server types allow you to configure the server exactly to your application’s needs, ensuring high performance, scalability, and security. This blog will walk you through the steps to deploy your Python app on either a VPS or dedicated server successfully.
Step 1: Update System Packages
First, make sure your Ubuntu server is up-to-date. This applies to both VPS and dedicated servers. Update all the system packages using:
sudo apt-get update
sudo apt-get upgrade
Step 2: Install Python and Pip
Python is usually pre-installed on Ubuntu, but you might want to install the most recent version. To install Python and pip, the Python package manager, use the following commands:
sudo apt-get install python3 python3-pip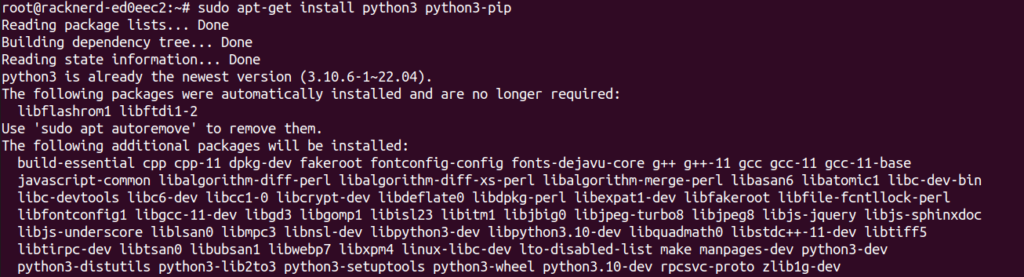
Verify the installation using:
python3 --version
pip3 --version
Step 3: Virtual Environment Set Up
Installing Python packages in a virtual environment acts as a sandbox and doesn’t interfere with the overall Python installation. This is especially useful for VPS environments where multiple applications might be hosted on the same server. Version conflicts are lessened as a result.
To create a virtual environment, first install venv:
sudo apt-get install python3-venvGo to the project directory now, and establish a virtual environment:
cd /path/to/your/project
python3 -m venv venv
As we have just created a virtual environment, activate it using:
source venv/bin/activate
There will be a slight change in the command prompt.
Step 4: Install Project Dependencies
Use pip to install the required packages for your application:
pip install -r requirements.txtVerify that all necessary packages are installed correctly.
Step 5: Configure Nginx (Web Server)
Nginx is a popular choice for serving web applications. Whether you’re deploying on a VPS or a dedicated server, Nginx can be configured to meet your application’s specific needs.
Install Nginx using:
sudo apt-get install nginxOpen the Nginx configuration file to configure it to serve your application:
sudo vi /etc/nginx/sites-available/yourappname.confAdd the following lines:
server {
    listen 80;
    server_name your_domain_or_IP;

    location / {
        include proxy_params;
        proxy_pass http://unix:/path/to/yourapp.sock;
    }

    location /static/ {
        alias /path/to/your/static/files;
    }
}
To enable it, link the configuration:
sudo ln -s /etc/nginx/sites-available/yourapp /etc/nginx/sites-enabledTest and restart Nginx:
sudo nginx -t
sudo systemctl restart nginx
Step 6: Serve the App with Gunicorn
Gunicorn is a Python WSGI (Web Server Gateway Interface) HTTP server designed to serve Python web applications. It acts as an intermediary between the web server (like Nginx) and your Python application, handling requests from clients and passing them to your application, then returning the application’s response to the client.
Install Gunicorn:
pip install gunicornRun your application with Gunicorn:
gunicorn --workers 3 --bind unix:/path/to/yourapp.sock examp:appReplace examp:app with the appropriate entry point for your application.
Step 7: Set Up a Gunicorn Systemd Service
To keep Gunicorn running in the background, create a systemd service file:
sudo vi /etc/systemd/system/yourapp.serviceAdd these lines:
[Unit]
Description=Gunicorn instance to serve yourapp
After=network.target

[Service]
User=youruser
Group=www-data
WorkingDirectory=/path/to/your/app
Environment="PATH=/path/to/your/app/venv/bin"
ExecStart=/path/to/your/app/venv/bin/gunicorn --workers 3 --bind unix:/path/to/your/app.sock wsgi:app

[Install]
WantedBy=multi-user.target
Reload the systemd daemon and start your app:
sudo systemctl daemon-reload
sudo systemctl start yourapp
sudo systemctl enable yourapp
Conclusion
Deploying a Python application on an Ubuntu server, whether it’s a VPS or a dedicated server, provides you with the flexibility and control necessary to optimize your application’s performance and security. For VPS setups, you gain the advantage of cost-effectiveness and easier scalability. For dedicated servers, you benefit from more power and exclusive resources.
By following the instructions provided in this guide, you can properly set up your application, configure your server, and ensure the best possible performance and security. Don’t forget to take things like scalability, security, and maintenance into account.
Through a thorough assessment of your requirements and the use of a VPS or dedicated Ubuntu server, you can establish a dependable and effective foundation for your Python application.