How to Migrate from Old VPS to New VPS using Rsync (Migrating a Linux VPS)
Leave a comment on How to Migrate from Old VPS to New VPS using Rsync (Migrating a Linux VPS)
Learn how to migrate your Linux VPS from an old server to a new one with this step-by-step guide. Discover essential techniques, tools, and best practices for a smooth server migration.
When it comes to migrating your VPS, there are numerous approaches available, ranging from simple to highly complex. The ideal migration method depends on your specific setup, technical expertise, and the nature of your hosted content. This guide presents one of the simpler methods to execute a VPS migration, but it’s crucial to understand that it’s just one option among many.
How to Migrate Your Linux VPS (Video Tutorial)
Here is a related video tutorial. Keep reading for the text-based version of this tutorial!
Recommended Experience Level: Fundamental Linux Skills
This guide is suitable for users who have a grasp of Linux fundamentals and are comfortable with basic server management tasks. To successfully follow along with this tutorial, you should:
- Be familiar with connecting to & using SSH, and have basic comfort with the command line interface
- Know how to use a simple text editor like nano
- Be able to copy and paste commands into the SSH terminal
- Understand the nature and intricacies of your server environment
While more extensive Linux knowledge can be beneficial, it’s not essential for this guide. We provide clear, step-by-step instructions throughout the process, making this an ideal migration tutorial even for those who are still building their Linux expertise.
Other Migration Methods
The method we are about to show you copies almost everything 1:1 (except system-specific configuration files) from one server to another, using a tool called rsync and should be an effective migration method for 90% of use-cases. However, when it comes to migrating from one VPS to another, it’s important to recognize that there’s no one-size-fits-all solution. The ideal migration method can vary dramatically depending on your specific use case, software stack, hosted content, and technical expertise. Here are some key points to consider:
1. Tailored Approaches: You don’t always need to migrate everything. Sometimes, a targeted approach focusing on specific components can be more efficient.
2. Built-in Tools: Many hosting control panels like cPanel, DirectAdmin, and Plesk offer built-in transfer tools designed for seamless migrations within their ecosystems.
3. Specialized Solutions: Depending on your setup, you might benefit from specialized migration tools or services tailored to specific applications or environments.
4. Partial Migrations: In some cases, you might opt for a partial migration, transferring only essential files/data, while setting up the rest of the environment from scratch on the new server.
5. Environment-Specific Methods: The nature of your environment – whether it’s a LAMP stack, a Node.js application, or a complex microservices architecture – can dictate the most appropriate migration method.
Remember, every environment is unique. What works best for one setup might not be ideal for another. Only you or the person who set up your server would know the intricacies of your environment, and can determine the most suitable migration method.
When planning your migration, consider the specific components that need to be transferred, and any dependencies between different parts of your system. Ultimately, the best migration strategy is one that aligns with your specific needs, minimizes risk, and ensures the continuity of your services. Don’t hesitate to consult with an experienced Linux system administrator or your designated IT professional if you’re unsure about the best approach for your unique situation.
Prerequisites
Before you begin, ensure you have the following ready:
1. Your source VPS (the one you wish to migrate from)
2. Your destination VPS (the one you’re migrating to). Make sure the destination VPS is a fresh install of the same OS version as your source VPS (there should be nothing installed or running on the new destination VPS – it should be a fresh instance).
3. Both servers accessible via SSH
4. Important: Ensure rsync is installed on both servers. If it’s not already installed, you can install it using these commands:
– For CentOS, AlmaLinux, or Rocky Linux:
sudo yum install rsync -y– For Ubuntu or Debian:
sudo apt-get update && sudo apt-get install rsync -y5. Critically important! Ensure that the new VPS has the exact same operating system version as the old one. If not, issues may arise. Take the time to double-check this closely. You can run the command `cat /etc/os-release` on both servers to ensure an exact match.
Creating the Exclusion List
Before we start the migration, we’ll create an exclusion list. This list helps optimize the migration process by identifying directories and files that don’t need to be transferred to the new VPS.
You’ll need to decide which directories to exclude based on your specific setup. Exclusions are beneficial for several reasons:
1. Reducing transfer time and bandwidth usage by skipping unnecessary files.
2. Avoiding the transfer of system-specific files that could cause conflicts on the new server.
3. Preventing the overwriting of crucial system files on the destination VPS.
The exact list may vary from system to system, depending on your particular configuration and needs. However, we’ve compiled a list of commonly excluded directories and files that should work for most cases. Feel free to modify this list based on your specific requirements.
Here’s how to create and populate the exclusion list:
1. On your source server, create a plain text file by typing:
sudo nano /root/excludedfiles.txt2. Once the file is open, copy and paste the following list. This serves as a starting point, covering many standard exclusions:
/etc/fstab
/etc/sysconfig/network-scripts/*
/etc/systemd/network/*
/etc/network/*
/etc/netplan/*
/etc/NetworkManager/*
/etc/resolv.conf
/etc/hostname
/etc/hosts
/etc/machine-id
/var/lib/dbus/machine-id
/proc/*
/tmp/*
/sys/*
/dev/*
/mnt/*
/boot/*
/boot/grub/*
/etc/default/*
/run/*
/var/run/*
/var/lock/*
/media/*
/lost+found
/swapfile
/swap.img
/var/lib/rpm/*
/var/lib/yum/*
/etc/sysconfig/iptables
/etc/iptables/rules.v4
/etc/iptables.rules
/var/lib/iptables/rules-save
/etc/ssh/*
/var/crash/*
/var/log/*/*
/var/cache/apt/*
/var/lib/apt/lists/*
/var/lib/cloud/*
/sys/class/dmi/id/product_uuid
/etc/udev/*
/lib/modules/*
/lib/firmware/*
/lib64/modules/*
/lib64/firmware/*
3. Save the file by hitting the CTL + X keys on your keyboard, followed by y, and enter. You will then be directed back to the SSH prompt for your source VPS.
This list excludes system-specific directories, temporary files and caches, log files, and other data that either shouldn’t be transferred and/or has already been generated on the new system. It also excludes some configuration files that are typically unique to each server and might cause conflicts if transferred.
Remember, while this list is a good starting point for most environments, you may need to adjust it based on your particular setup. If you’re unsure about any specific exclusions, it’s best to consult with a Linux systems administrator familiar with your configuration.
Performing the Migration
Now we’ll perform the actual migration (as a reminder, before we begin, make sure that rsync is installed on both servers, as covered in the “Prerequisites” section of this post).
1. First, copy the following command to a notepad on your local computer so that we can adjust it accordingly to your values.
sudo rsync -vPa -e 'ssh -p 22 -o StrictHostKeyChecking=no' --exclude-from=/root/excludedfiles.txt / root@REMOTE-IP-OF-THE-NEW-SERVER:/
Within your notepad document, replace `REMOTE-IP-OF-THE-NEW-SERVER` with your destination VPS’s IP address (your new server IP). If needed, replace ‘22’ with your SSH port if you have a custom SSH listening port set up.
2. After editing, copy the entire command from your notepad to your clipboard by selecting all and doing CTL + C, and then paste it onto your SSH window (note: make sure you are logged into the source VPS at this time).
You will be prompted to enter the password for the destination VPS (new server), so that your old server can communicate with your new server. Go ahead and enter it, and then press enter.

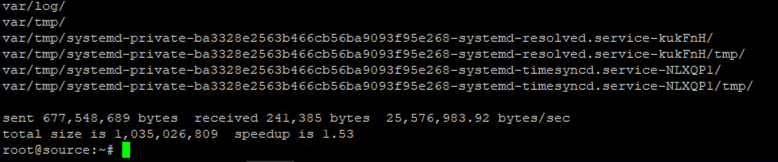
3. This process may take some time depending on the amount of data being transferred. Once it’s complete, you’ll notice something similar to the below screenshot, and you’ll also notice that your SSH session is back to a ready prompt:
4. At this point, shut down your old source server, and reboot your destination server. Typically, these functions should be available in your provider’s VPS control panel area. For example, if you’re using RackNerd, you can perform these actions via the SolusVM control panel (also referred to as “NerdVM”).
5. After rebooting the destination server and allowing a couple minutes for it to come back online after the reboot, connect to your new server (the destination server) using SSH. Important: Use the IP address of your new server to connect, but enter the root password from your old server to log in. This is because the migration process copied over the user and password configurations from the old server to the new one. Don’t mix up the passwords – you’re essentially logging into the new server with the old server’s credentials.
6. You can verify the transfer by logging into your destination VPS and checking that your files are present.
Post-Migration Steps
After the migration is complete:
1. Update your DNS records to point to your new VPS IP address if applicable.
2. Review and update any configuration files that might reference your old VPS IP address.
3. Restart any services that were running on your old VPS on the new one.
4. Test your websites and applications to ensure they’re functioning correctly on the new VPS.
Important Caveats
While this method provides a quick and simple way to migrate your VPS, it’s important to understand its limitations. This approach isn’t 100% set-and-go, and its effectiveness depends entirely on your software stack and environment.
For example, if you’re using a hosting control panel like cPanel, this method may not be ideal due to the numerous dependencies involved and could potentially cause issues. For such environments, it’s advisable to follow the software stack’s recommended migration procedure. cPanel/WHM, for instance, has its own transfer tool feature designed specifically for migrations.
Additionally, some configurations that reference your old VPS IP may be transferred during this process (such as web server software configurations). You may need to adjust these accordingly to your new VPS IP after migration.
The effectiveness of this migration method can vary greatly depending on your specific setup. If you’re not sure about the best way to proceed, it’s highly recommended to consult with an experienced Linux systems administrator and/or your IT team before proceeding with any migration.
Conclusion
This guide presents a simple method for performing a near 1:1 migration of your Linux server from one server to another using the rsync tool. However, we strongly recommend consulting with an experienced Linux systems administrator or your designated IT professional to determine the best migration methods for your specific use case.
RackNerd does not assume any responsibility for your migration configuration or methods. The approach outlined here is just one of many possible solutions, and may not be suitable for all situations. Always ensure your migration strategy aligns with your specific environment and software stack, and consider any and all intricacies.